The “restaking” protocol with $15 billion in deposits won’t pay rewards to depositors and is missing its mission-critical “slashing” feature.
DeFi Borrower Behavior Key to Gauging Tokenization Risks: BIS Study
The study was designed to look at the largely unexplored “intricacies” of user behavior and dynamics of decentralized finance lending, the authors said.
The Protocol: Restaking Tokens Are Exploding, and Restaking Isn’t Even Live
In this week’s issue of our weekly blockchain tech newsletter, Sam Kessler explores how “liquid restaking tokens” or LRTs are remaking decentralized finance. PLUS: Starknet’s STRK airdrop, Stellar’s smart-contract facelift and bitcoin’s supply crunch.
DeFi Platform Pendle Nears $1B in Total Value Locked
Pendle crossed the $100 million TVL mark in mid-June 2023.
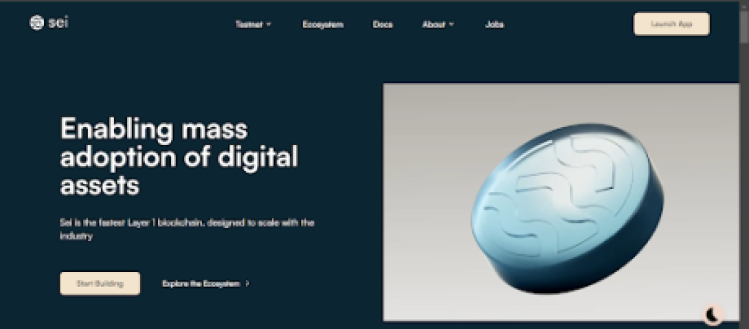
What Is Sei (SEI) Network?
The Sei (SEI) Network is a Cosmos-based layer-1 blockchain that aims to change the world of digital asset trading, especially in the decentralized exchange (DEX) ecosystem. It was specifically designed for the world of trading, featuring various sectors of the cryptocurrency space spanning GameFi, NFTs, and, most especially, decentralized finance (DeFi). Sei is positioned as the “Decentralized NASDAQ,” as it offers a seamless blend of centralized finance (CeFi) trading experiences with decentralized finance tools.
Since its inception, it has established itself as a major player in the cryptocurrency space by providing cutting-edge features and advantages over rivals. With its innovative technology stats and passionate community, it has become one of the fastest-growing Layer 1 blockchains for trading and other purposes.
At its core, the SEI token is designed to optimize and streamline business operations and interactions. It is expected to be not just a cryptocurrency but a comprehensive solution that addresses several challenges in the contemporary blockchain ecosystem.
Who Are The Founders Of Sei Network?
Sei (SEI) network founders and brains behind the SEI are Jayendra Jog, Dan Edlebeck, and Jeffrey Feng. Jayendra Jog was the former lead software engineer at Robinhood, a popular centralized crypto exchange.
Dan Edlebeck is the co-founder and CEO of Exidio, a decentralized VPN application in the Cosmos ecosystem. Lastly, Jeffrey Feng brought his investment experience from his role at Goldman Sachs.
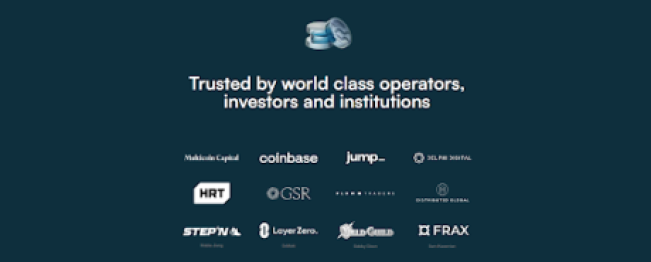
Investors And Institutions Backing the SEI Token
The Sei network has a lot of credible investors and institutions backing it, such as Coinbase, which is one of the largest centralized exchanges (CEX) in the world; Jump, Muitcoincapital, Layer Zero, GSR, and many more, as shown in the screenshot from the website below.
What Sei Network Aims To Achieve In The Crypto Space And Beyond
Sei aims to foster smart, efficient, and sustainable enterprises, and it does so by leveraging the power of blockchain technology to automate processes, reduce costs, and eliminate intermediaries. This makes Sei tokens a frontrunner in the race toward a decentralized future.
Sei token is unique in its approach and functionality as it goes beyond the standard features of cryptocurrencies and offers a sophisticated governance model encouraging active community participation. It takes the decentralization aspect a notch higher by ensuring fair and transparent decision-making.
The token is designed for compatibility and scalability, allowing seamless integration with new and existing business systems. This means whether you are a large corporation like Blackrock, which manages $10 trillion in assets, or a small business startup, the Sei token is designed to fit right into your operations, providing you with the benefits of blockchain without the hassle of overhauling your business system.
How Does Sei (SEI) Work?
One of the major problems with decentralized exchange (DEXs) is that orders are either not processed on-chain or are processed on-chain on a fast blockchain at the expense of decentralization and security.
Given this bottleneck, the Sei network has implemented several innovative features to resolve the challenges faced by decentralized exchanges (DEXs) by combining off-chain speed with on-chain security. It aggregates orders at the end of the block and executes them all at once rather than executing them one at a time, and in this way, it prevents the persistent problem of front-running in decentralized trading.
The Sei network also makes use of native price oracles that minimize external dependencies while offering trustworthy data feeds. It handles the placement and execution order of a single transaction as opposed to doing so in two (2).
What Makes The Network Unique?
The Sei network stands out from the rest due to its self-executing smart contracts with the terms of the agreement directly written into code lines. The code and the agreement contained therein then exist across a distributed blockchain network.
This means that the transactions are irreversible and trackable, and they do not require a third-party intermediary. This automation process drastically reduces costs and increases efficiency, making transactions smooth and very easy.
Sei tokens also utilize a decentralized infrastructure, which means any single central entity or authority does not control it. Instead, control is spread out amongst many different nodes or computers that participate in the network to ensure that even if one node goes down, the entire network continues running smoothly.
The decentralized nature of the SEI token fosters a sense of community and mutual trust among its users. It boasts a democratic system that encourages active participation and promotes transparency and fairness.
Notable Features Of The Sei (SEI) Network
Twin-Turbo Consensus Mechanism: The Sei network leverages the Cosmos SDK and Tendermint Core to provide decentralized trading apps with speed, security, capital efficiency, and decentralization.
Parallelization: The Sei blockchain divides work into smaller chunks, processing and executing them simultaneously to prevent front-running.
Native Order Matching: The Native Order Matching feature ensures that decentralized exchanges (DEXes) are able to have their own central limit order book (CLOB).
Order Bundling: Sei offers order bundling at the client and chain level to enhance user experience and efficiency.
Price Oracles: It’s integrated into a native system for trustworthy assets with real-time oracles provided by validators, meaning that Sei provides users with an Oracle module that functions as a token price reference.
Lightning Speed Transactions: Sei claims to offer 600 milliseconds in transaction finality, making it highly scalable compared to other crypto projects like Bitcoin, Ethereum, and even Solana.
Fee Structure: At launch, SEI tokens have no chain-level trading fees; however, decentralized exchanges (DEX) may introduce their transaction fees through smart contracts.
Potential Applications Across Various Industries
Banking and Financial Industry: The Sei blockchain technology is designed to streamline operations, eliminating the need for intermediaries and reducing transaction costs. This will bring a new level of transparency to the banking and financial industry, with every transaction recorded and traceable on the blockchain.
Medical and Healthcare Industry: The Sei network offers an efficient way to manage and share patient data securely. This can help eradicate fraudulent activities, improve patient care, and enhance data interoperability.
Supply Chain (Import and Export) Industry: The Sei blockchain network token can ensure the authenticity and traceability of products, from the raw materials to the end consumers. Every step can be recorded on the blockchain, providing full visibility and reducing the emergence of counterfeit goods and products.
Impact on the Environment: Sei’s eco-friendly consensus mechanism significantly reduces energy consumption compared to traditional cryptocurrency. Its smart contracts can automate carbon credit trading, supporting businesses in their sustainability efforts.
Digital Identities: The Sei network can be employed to develop a secure decentralized solution for managing digital identities and protecting individuals’ privacy and digital data.
The Tokenomics Of SEI Coin
Sei’s native cryptocurrency, SEI, does not have a maximum supply of tokens to be mined. However, it has a total supply of 10 billion coins. This means all of the tokens in circulation have been free-mined on the blockchain, including those that are locked or reserved. The token has a circulating supply of 2.4 billion at the time of publication.
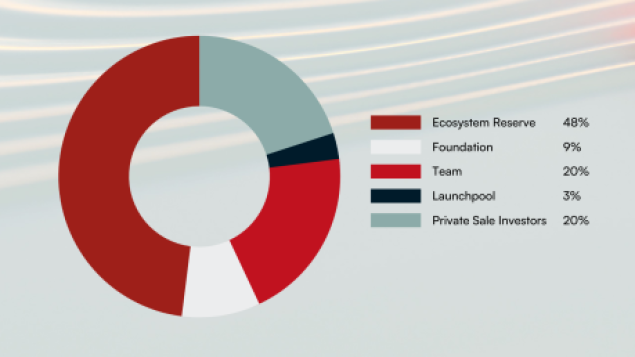
According to its website, 48% of the supply is in an Ecosystem Reserve, with Private Sale Investors and the Team receiving 20% of the supply, respectively. 9% of the supply went to the Sei Foundation and the Launchpool received 3% of the supply.
Sei token is up 619% since its all-time low of $0.09536 on October 19, 2023, and its latest all-time high of $0.8778 was recorded on January 3, 2024. With a market cap of $1.5 billion, it is currently the 48th-largest cryptocurrency in the industry.
Conclusion
The Sei network aims to solve issues not only in the crypto industry but also in other industries. This includes the likes of the banking and financial industry, where it aims to reduce the costs of transactions by eliminating the use of intermediaries and providing top-notch security measures to protect user privacy and identities.
The blockchain is energy-efficient compared to the likes of Bitcoin as it doesn’t consume as much energy. Its super-fast 600-millisecond transaction finality makes it highly scalable on a scale comparable to Kaspa, whose full confirmation transactions are at an average of 10 seconds.
What Are The Top 8 DeFi And Web3 Wallets To Use In Crypto?
In this article, we will explore the finest Web3 and DeFi wallets that offer substantial advantages to crypto users. While Web3 wallets and DeFi wallets share a strong connection, it’s important to understand their distinctions. By highlighting the top wallets in both categories, we aim to provide users with valuable insights into the wallets that can enhance their Web3 and DeFi experiences.
Web3 wallets are specifically crafted to engage with decentralized applications (DApps) on blockchain networks, empowering users with the essential tools to securely oversee their digital assets and participate in the realm of decentralized web.
Essential Aspects To Note Regarding Web3 Wallets
Cross-Chain Support: Most Web3 wallets support multiple blockchain networks, allowing users to access and manage various DApps and different cryptocurrencies from a single interface.
Seamless DApp Interaction: Web3 wallets allow users to seamlessly connect and interact with a wide range of DApps. They provide a convenient way to authenticate with DApps, sign transactions, and manage account balances.
Enhanced Security Features: Web3 wallets optimizes security measures, such as encrypted storage of private keys and protection against phishing attacks. They often offer features like two-factor authentication and recovery options to ensure the safety of user funds.
Essential Features Of DeFi Wallet
DeFi wallets are a specialized category of Web3 wallets designed specifically for the decentralized finance ecosystem. These wallets offer advanced functionalities and specific features essential for engaging in diverse DeFi protocols like lending, borrowing, yield farming, and staking. By catering to the unique requirements of DeFi, these wallets empower users to seamlessly participate in the decentralized financial landscape. These wallets provide supplementary features specifically designed to cater to the needs of DeFi users.
Here are some characteristics of DeFi wallets:
Token Swapping and Yield Farming: DeFi wallets often include built-in features for token swapping and yield farming. Users can swap tokens directly within the wallet interface and participate in yield farming to earn rewards.
DeFi Protocol Integration: DeFi wallets integrate with popular DeFi platforms, enabling users to easily access and interact with lending protocols, decentralized exchanges (DEXs), yield farming platforms, and more.
Gas Optimization: Gas optimization features enable users to estimate and adjust transaction fees, ensuring cost-efficient interactions with DeFi protocols.
Note: DeFi and Web3 share some common features, as they both operate within the broader context of blockchain technology and decentralized applications (DApps).
Examples Of Enhanced Web3 And DeFi Wallets
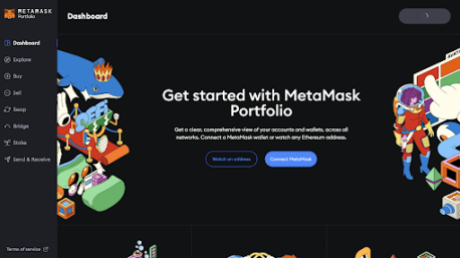
Metamask Wallet
MetaMask is a popular and user-friendly Web3 wallet that has garnered considerable recognition within the cryptocurrency community. Serving as a browser extension wallet that seamlessly integrates with the Ethereum network, users can easily manage their Ethereum-based assets, including Ether (ETH) and ERC-20 tokens.
MetaMask also features a built-in DApp browser, enabling direct access and interaction with a wide range of Ethereum-based decentralized applications (DApps). The wallet prioritizes security by implementing encrypted storage, password protection, and optional hardware wallet integration.
Additionally, MetaMask supports token swapping through decentralized exchanges (DEXs) like Uniswap and SushiSwap, along with integration with various DeFi platforms for lending, borrowing, yield farming, and other DeFi activities. It also offers compatibility with multiple Ethereum test networks for testing and development purposes.
MetaMask supports various networks in addition to the Ethereum mainnet. A few of the numerous networks supported by MetaMask are Binance Smart Chain (BSC), Arbitrum(ARB) and Polygon (MATIC), among others.
Straightforward Guide On How To Get The Metamask Wallet
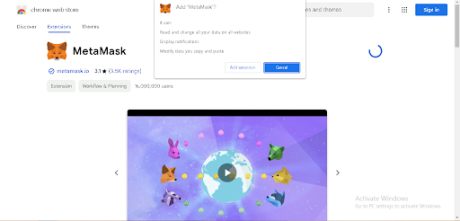
The first step is to visit the authentic Metamask website and click on the “Get Chrome Extension” or “Get Firefox Add-On” button, depending on your browser choice.
See the Chrome browser Illustration below:

After clicking on the “Add to Chrome” button, a popup window will appear, asking for confirmation to add the extension. Click “Add Extension” to proceed.
Once the extension is installed, you will see the MetaMask icon in your browser toolbar. Click on the icon to launch MetaMask. You will be presented with the option to create a new wallet.
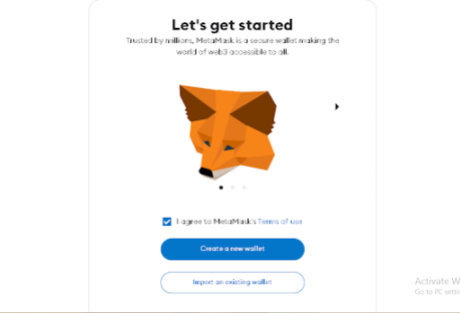
Once that is done, follow the on-screen instructions to create a new wallet.
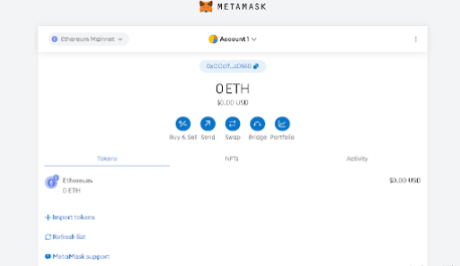
In the final step, MetaMask will provide you with a unique seed phrase consisting of 12 or 24 words. Write it down and keep it securely offline. Confirm your seed phrase as prompted by MetaMask by selecting the words in the correct order, after which you can start using MetaMask to manage your Ethereum-based assets, interact with DApps, and participate in DeFi activities.
Keplr Wallet For Web3
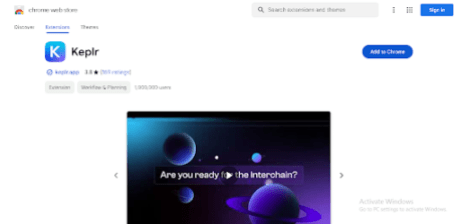
Keplr is a web3 wallet primarily designed for interacting with decentralized applications (DApps) on the Cosmos network. However, it offers support for specific decentralized finance (DeFi) functionalities within the Cosmos ecosystem. The Keplr wallet is known to support networks like Celestia, Osmosis, Terra, and Secret Network.
How To Get And Set Up Keplr Wallet
To begin, you should install the Keplr extension with the appropriate extension store for your browser, such as the Chrome Web Store. To Download, click on the “ Add to Chrome” button as illustrated below:
When creating a new wallet, carefully follow the instructions displayed on your screen to establish a robust password and consent to the terms of use. Remember to store your password securely since it is essential for accessing your wallet (If you have an existing wallet, select the “Import Existing Wallet” option and follow the instructions).
Write down your recovery or seed phrase and store it securely. Remember, it is advisable to never store your seed phrase online due to the risk of being hacked.
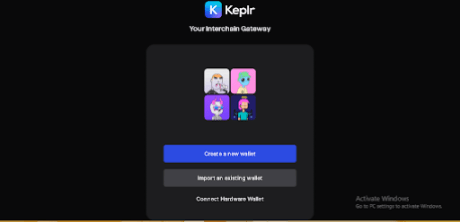
After setting up or importing your wallet, connect to the desired network or blockchain supported by Keplr. Once connected, you can start interacting with Cosmos ecosystem DApps. Explore the available DApps and features, and follow on-screen instructions to use them with your Keplr wallet.
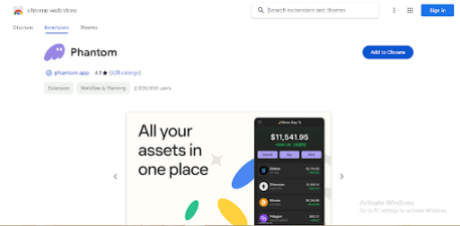
Phantom Wallets
Phantom is a widely used cryptocurrency wallet specifically created for the Solana blockchain. It provides an intuitive interface and smooth integration with Solana-based decentralized applications (DApps), enabling users to securely manage, transfer, and receive digital assets within the Solana ecosystem.
How To Get Phantom Wallet
To get started, install the Phantom extension from the relevant extension store for your browser, like the Chrome Web Store. Click on the “Add to Chrome” button, as shown in the illustration below:
To set up your Phantom wallet, simply click on the Phantom icon located in your browser’s toolbar, which will launch the wallet interface. From there, follow the on-screen instructions to either create a new wallet or import an existing one using your recovery phrase or private key.
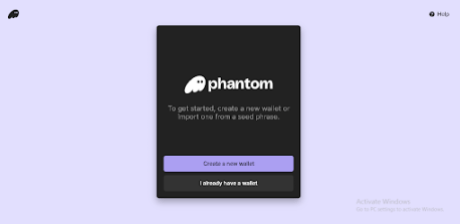
Set a strong password you can remember and save recovery phrases offline (do not store on the device).
Once your wallet is set up, you can conveniently access it at any time by selecting the Phantom icon in your browser’s toolbar. This grants you the ability to manage your digital assets, engage with Solana-based DApps, and carry out various wallet-related tasks.
UniSat Wallet
UniSat Wallet is an open-source Chrome extension that provides a secure and user-friendly solution for storing and transferring bitcoins and Ordinals on the Bitcoin blockchain. It offers features like immediate access to unconfirmed transactions, enabling faster inscription operations without a full node. Additionally, it supports the storage and transfer of BRC-20 tokens, allowing users to manage both bitcoins and BRC-20 tokens in one wallet.
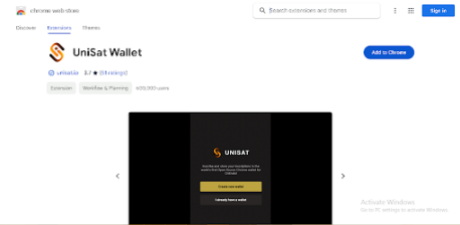
How To Get UniSat Wallet For Web3
To begin, install the UniSat extension from the relevant extension store for your browser, like the Chrome Web Store. Click on the “Add to Chrome” button, as shown in the illustration below:
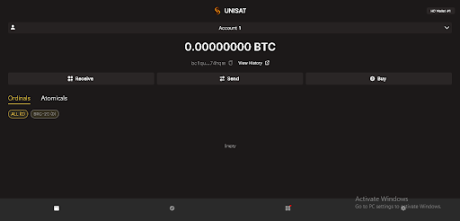
For the next step, simply click on the UniSat icon located in your browser’s toolbar, which will launch the wallet interface. From there, follow the instructions to either create a new wallet or import an existing one using your recovery phrase or private key.

Once your wallet is set up, you can conveniently access it at any time by selecting the UniSat icon in your browser’s toolbar.
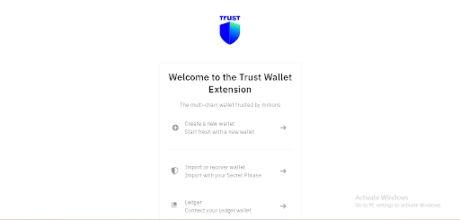
Trust Wallet
Trust Wallet is a versatile wallet that serves as both a decentralized finance (DeFi) and a Web3 wallet. It enables users to interact with decentralized applications (DApps) and protocols within the DeFi ecosystem, including decentralized exchanges, lending platforms, and yield farming protocols. Additionally, it integrates with the Web3 ecosystem, allowing users to interact directly with blockchain networks, sign transactions, and securely manage their digital assets on platforms like Ethereum and other compatible networks.
How To Get Trust Wallet For Web3
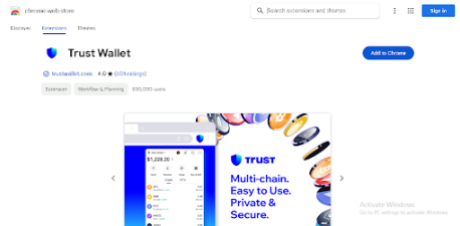
First, users can download the Trust Wallet app or install the Trust Wallet extension from the relevant extension store for their browser or mobile device, like the Chrome Web Store. Click on the “Add to Chrome” button, as shown in the illustration below:
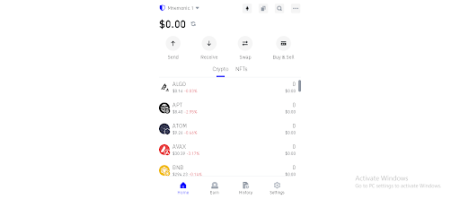
Next, simply click on the Trust Wallet icon located in your browser’s toolbar, which will launch the wallet interface. From there, follow the instructions to either create a new wallet or import an existing one using your secret phrase as instructed in the image below:
Once you have meticulously set up your password and safely stored your secret phrase offline, you will gain access to your Trust Wallet. With these security measures in place, you can securely and confidently log into your Trust Wallet account and manage your digital assets.
Exodus Wallet
Exodus Wallet is a widely used software wallet for cryptocurrencies, offering users a secure means to store, manage, and trade various digital assets. It is accessible as a desktop application compatible with Windows, Mac, and Linux systems, along with a mobile app for iOS and Android devices. Exodus Wallet provides support for multiple blockchain networks, enabling users to effectively handle and engage with diverse cryptocurrencies. Among the networks supported are Litecoin (LTC), Stellar (XLM), Ripple (XRP), and Bitcoin (BTC).
How To Set Up Exodus Wallet
To begin, download and install the Exodus Wallet extension from the appropriate extension store based on your browser, such as the Chrome Web Store. Locate the “Add to Chrome” button, as depicted in the accompanying image, and click on it to initiate the installation process.
To proceed, just click on the Exodus icon situated in the toolbar of your browser. This action will open the wallet interface, where you can then follow the provided instructions to either generate a new wallet or import an existing one using your recovery phrase or private key.
For new wallets, do not forget to write down your recovery phrase in a safe place and do not store it online. Additionally, it is advisable to not take screenshots as well.
Next, Click on the “Create New Wallet” and carefully set up your password or “I Have A Wallet” button using your secret phrase to get started.
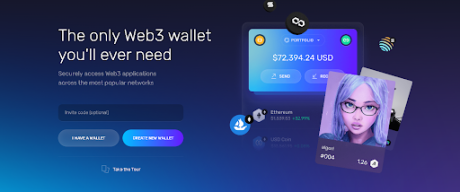
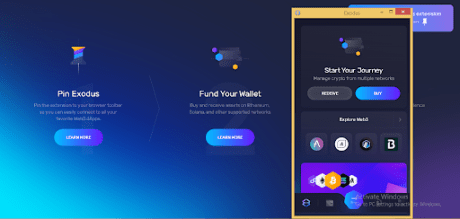
Then, you can connect Exodus wallet to a network of your choice and start your trading journey:
Argent Wallet For DeFi
Argent Wallet is a popular non-custodial cryptocurrency wallet that prioritizes simplicity, security, and usability. It serves as a Web3 wallet, offering users a convenient and user-friendly interface to engage with decentralized applications (DApps) and the broader Web3 ecosystem.
By integrating with Ethereum and compatible networks such as xDai, Polygon (MATIC), and Ethereum (ETH), Argent Wallet empowers users to manage their digital assets and actively participate in various Web3 activities. With its focus on user experience and compatibility with multiple networks, Argent Wallet provides a versatile solution for individuals seeking a seamless and secure Web3 wallet experience.
How To Get And Set Up Argent Web3 Wallet
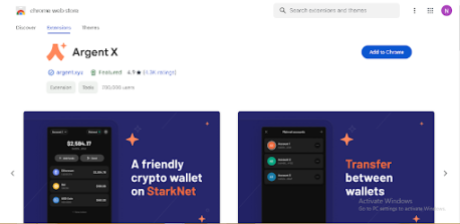
To get started, you’ll need to install the Argent extension for your browser by visiting the appropriate extension store, such as the Chrome Web Store. Look for the “Add to Chrome” button, which is depicted in the accompanying illustration. Click on that button to initiate the installation process.
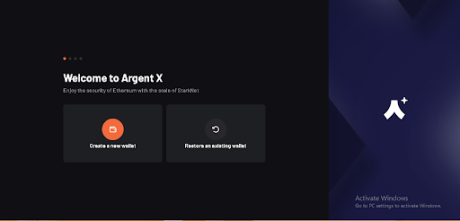
Next, if you’re a new user, click on “Create a new wallet,” and you will be prompted to create a password.
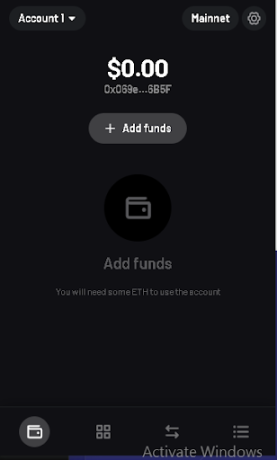
To securely manage and interact with digital assets, decentralized applications (DApps), and the Web3 ecosystem, save your recovery phrase (write it down. do not store it on your device), and your Argent wallet will be ready to use.
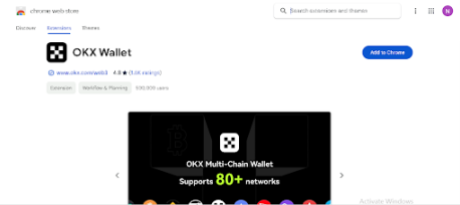
OKX Wallet For DeFi
OKX Wallet is a prominent non-custodial wallet that provides users with the ability to securely manage their cryptocurrencies, non-fungible tokens (NFTs), and digital assets within a unified platform.
With OKX Wallet, users have the capability to purchase, trade, earn, and oversee their digital assets across more than 50 blockchains, including Bitcoin, Ethereum, OKT Chain, Solana, BSC, and Aptos, all available in over a dozen languages.
How To Set Up OKX Wallet
To set up using the Chrome browser extension, click on the ‘Add to Chrome” button in the top right corner, as shown in the image below:
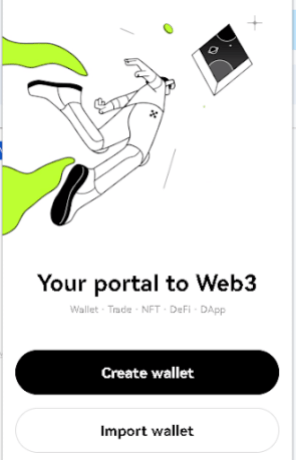
Next, select the “Create Wallet” option as shown below:
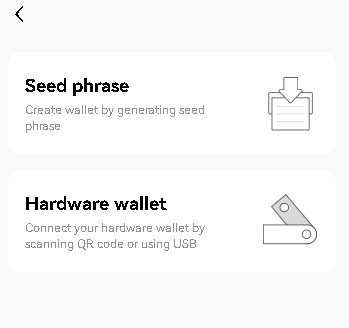
OKX will present users with the option of creating wallets with either seed phrases or hardware wallets. In the absence of hardware wallets, as in this case, select the “seed phrase” option.
Set the password, verify the seed phrase, and your OKX wallet will be ready to use. Write down your seed phrase and store in a safe place. Do not store online.
Downloading DeFi And Web3 Wallets On Mobile Phones
The wallets listed in this guide also have mobile versions which are available on the app stores of your mobile phone. Navigate to the Apple App Store for iOS or the Google Play Store for Android, input the name of the wallet you want to download in the search bar, make sure you have the correct app and click “Download.”
To set up the wallets on mobile phones, follow the same steps outlined in this guide to get started, and your wallets will be set up.
Conclusion
In conclusion, Web3 and DeFi wallets offer users enhanced digital asset management and participation in decentralized applications. Web3 wallets provide cross-chain support, seamless DApp interaction, and enhanced security features, while DeFi wallets cater specifically to the decentralized finance ecosystem with functionalities like token swapping and yield farming. Understanding these unique characteristics helps users make informed choices.
Examples of enhanced Web3 and DeFi wallets worth exploring have been mentioned in this article. Staying informed about the latest developments in this evolving technology is crucial for unlocking the full potential of decentralized applications and ensuring asset security.
How To Buy, Sell, And Trade Crypto Tokens On The Tron Network
The Tron network is a decentralized blockchain platform that aspires to create an expansive and interconnected global digital content ecosystem. At its core, Tron leverages its native cryptocurrency, TRX, to facilitate seamless transactions and interactions within the network.
An outstanding advantage of the Tron (TRX) network lies in its exceptional scalability and impressive transaction processing capacity. This remarkable feature enables Tron to process a substantial number of transactions swiftly, ensuring the smooth execution of smart contracts and decentralized applications (DApps). The network’s scalability is of utmost importance as it plays a vital role in supporting the expansion of its ecosystem and meeting the growing needs of both users and developers.
Tron (TRX) empowers developers to create and launch decentralized applications (DApps) through the integration of smart contracts into its framework. These versatile DApps span across diverse sectors, including finance, gaming, social media, and more. Tron equips developers with essential tools, resources, and support, enabling them to craft cutting-edge and fully operational applications. This fosters a dynamic developer community, driving ongoing expansion and diversification within the Tron ecosystem.
Tron’s emphasis on digital content is a distinguishing feature of the network. It aims to revolutionize the entertainment industry by directly connecting content creators and consumers without the need for intermediaries. The platform empowers creators by enabling them to distribute their content and monetize it through direct interactions with their audience.
The network (TRON) relies on a delegated proof-of-stake consensus mechanism for its security. Validators in the network are rotated every six hours, chosen by users who stake their TRX tokens.
To combat software bugs, Tron involves its community through the Bug Bounty Program. Users can contribute to development and earn rewards by reporting bugs and vulnerabilities. The Tron Foundation generously provides TRX rewards as an incentive, fostering a collaborative environment for network security.
This article delves into the fundamental features of the TRON network and explores its significant potential within the TRON ecosystem while also providing guides on how to buy, sell and trade on the network.
Features Of The TRON Network
Delegated Proof-of-Stake (DPoS) Consensus: The DPoS is a consensus mechanism utilized by the TRON network to enable its users to vote for representatives responsible for validating transactions and securing the network. This system guarantees swift transaction confirmation and streamlined network operations, enabling scalability and suitability for high-demand applications.
Smart Contracts and DApps: TRON offers a platform for the creation and implementation of smart contracts, which are self-executing agreements governed by predetermined rules. These smart contracts serve as the foundation for developing decentralized applications (DApps) that automate processes, enhance peer-to-peer interactions, and introduce trailblazing functionalities in sectors including finance, gaming, social media, and more.
Developer-Friendly Environment: TRON fosters a developer-friendly ecosystem by equipping developers with essential tools, resources, and support to build innovative and functional DApps. It offers user-friendly programming languages, software development kits (SDKs), and comprehensive documentation to optimize the development process. This commitment to developers encourages a vibrant community, promotes collaboration, and fuels ongoing growth and diversification within the TRON ecosystem.
Scalability and Throughput: One of the main purposes of the TRON network is that it is purposefully built to efficiently process a substantial number of transactions with exceptional throughput. Its infrastructure facilitates swift transaction execution, ensuring seamless operations for smart contracts and decentralized applications (DApps). This scalability plays a vital role in meeting the increasing adoption and requirements of users and developers.
Global Accessibility: TRON’s decentralized architecture guarantees worldwide accessibility, enabling individuals from across the globe to engage with the network. The platform’s infrastructure is intentionally designed to be accessible to anyone with an internet connection, promoting inclusivity and fostering a digital ecosystem without any geographical boundaries.
Direct Creator-Consumer Interaction: TRON enables content creators to engage directly with their audience without intermediaries. This direct connection fosters a more intimate and transparent relationship, allowing creators to better understand their audience’s preferences and tailor their content accordingly.
Ownership Rights: TRON acknowledges the significance of content ownership for creators and leverages the immutability and transparency of blockchain technology to safeguard their intellectual property rights. By doing so, TRON empowers creators to retain control over their content and ensures they are duly compensated for its utilization.
Monetization Opportunities: TRON empowers content creators by enabling them to directly monetize their content. By leveraging smart contracts and digital tokens, creators can receive payments directly from their audience, bypassing the need for third-party payment processors. This direct monetization approach allows creators to retain a greater share of their earnings and exert more control over their revenue streams.
How To Get Started On The Tron Network
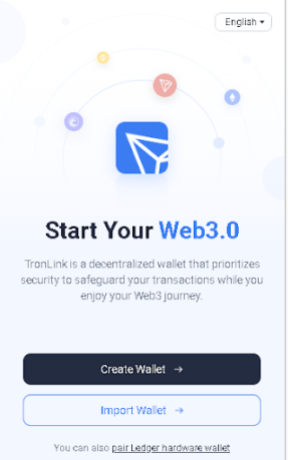
To buy and sell tokens on the TRON network, you will first need to get a TRON-compatible wallet like Tronlink. In this article, we will give examples using Tronlink. It is a popular TRON wallet extension and is readily accessible on leading browsers such as Google Chrome.
Related Reading: How To Buy, Sell, And Trade Tokens On The Optimism Network
With TronLink, users can effortlessly create and oversee TRON wallets, securely store TRX, as well as other TRC-10/TRC-20 tokens, and seamlessly engage with TRON DApps, all within the convenience of their browser interface.
To add your TronLink Wallet as a browser extension, simply click on the “Add to Chrome” icon located in the top right corner, as demonstrated below. This step will ensure that your TronLink Wallet becomes seamlessly accessible within your browser.
Once installed and set up, Open the TronLink extension in your browser. You will be prompted to either create a new wallet or import an existing one. If you’re new to TronLink, select the option to create a new wallet and follow the instructions to set up a password.
It is imperative to back up your wallet to ensure you can recover your funds in case of any unforeseen circumstances. TronLink will provide you with a unique set of recovery phrases during the wallet creation process. Write down and securely store these phrases in a safe place. (Do not store it on your device).
Trading On The TRON Network
The Tron network is capable of supporting various decentralized applications. Tron is often used to transact, as TRX transactions come with very low fees.
In order to engage in trading activities on the TRON network, it is essential to have TRX tokens in your wallet. TRX serves as the native cryptocurrency of the TRON network and is indispensable for executing trades, interacting with decentralized exchanges, and participating in decentralized finance (DeFi) protocols.
Hence, prior to initiating any trading or transactions on the TRON network, it is crucial to ensure that your wallet is adequately supplied with TRX tokens.
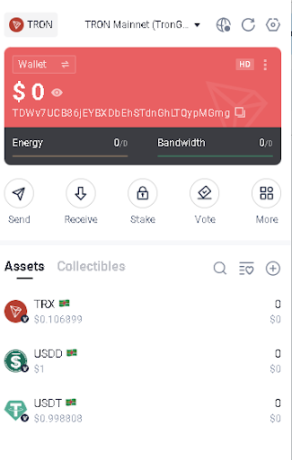
The next step is to fund your wallet. You can add TRX or other TRC-10/TRC-20 tokens to your TronLink wallet. Click on the “Receive” button in your Tronlink wallet to generate a wallet address; tokens will be available in your wallet almost immediately.
You can obtain TRX using popular cryptocurrencies like Bitcoin (BTC) or Ethereum (ETH) from cryptocurrency exchanges like Binance and transfer it to your TronLink wallet address.
Note that users can also access various DEXs interfaces like SunSwap through their Tronlink wallet by clicking on the “More” button in the same row as the “Receive” button.
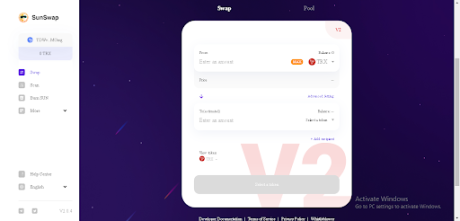
How To Buy and Sell Tokens Using SunSwap
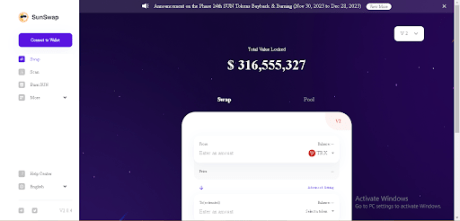
SunSwap is a decentralized trading protocol built on the TRON network, with the objective of facilitating automated liquidity provision and establishing an inclusive financial market accessible to all users. By utilizing the decentralized nature of blockchain, SunSwap enables users to participate in liquidity provision by depositing their TRON-based tokens into liquidity pools.
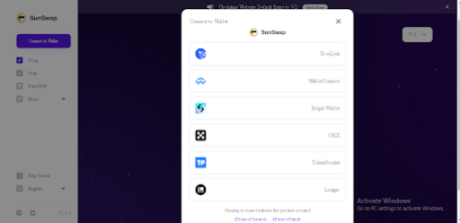
To protect your wallet from malicious activity, ensure that you are on the correct SunSwap website. To get started, visit the correct SunSwap website and click on the “Connect Wallet” option at the top left corner, as in the image below:
Then, select your preferred wallet (In this case, Tronlink):
Once connected, Users can commence trading activities as SunSwap is automatically linked to the TRON networks because it is a TRON-based DEX.
After accessing the SunSwap interface, the next step is to select the tokens you want to trade. SunSwap operates on a system where you can exchange your TRON-based tokens directly with other tokens.
Click on the “Select token” button to select the trading pair you want to trade against.
For example, if you want to buy USDT using TRX, select TRX – USDT, enter the amount, then click on “swap” or “trade now” and then you can go to your Tronlink wallet to confirm the transaction.
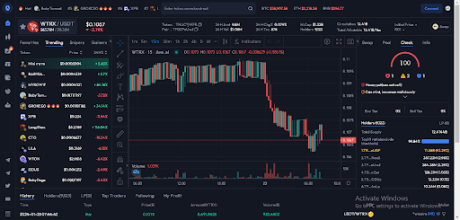
Tracking Token Prices on The TRON Network
Avedex is a powerful on-chain tool for TRON network users, offering comprehensive market insights for specific tokens. It provides valuable information such as price data, contract details, and advanced analytics tools. Traders can analyze price trends, liquidity, and token fundamentals to make informed trading decisions.
Additionally, Avedex allows for token comparison, user reviews, and rating systems, enhancing the decision-making process. With integration to TRON wallets and notification features, Avedex streamlines the trading experience, enabling users to stay updated and act promptly.
Related Reading: Celestia Network: How To Stake TIA And Position For 5-Figure Airdrops
Overall, Avedex empowers TRON traders with reliable information and tools to navigate the market effectively and make well-informed trading choices.
Conclusion
In conclusion, the TRON (TRX) network offers a decentralized blockchain platform that prioritizes the creation of a global digital content ecosystem. With its scalable infrastructure and high transaction processing capacity, TRON enables the swift execution of smart contracts and decentralized applications (DApps) across various sectors. The network’s developer-friendly environment provides essential resources and support for developers to build innovative DApps, fostering a vibrant community within the TRON ecosystem.
To engage with the TRON network, users need a TRON-compatible wallet like TronLink. They can obtain TRX tokens from various popular exchanges, transfer them to their TronLink wallet, and then trade on platforms like SunSwap for decentralized trading.
Overall, the TRON network offers a robust ecosystem for buying, selling, and trading tokens, while its focus on digital content and developer support makes it an attractive platform for creators and users alike.
How To Buy, Sell, And Trade Crypto On The Base Network
The foundational infrastructure of the Base Network brings about yet another Ethereum Layer 2 network, distinguished by its scalability and empowerment through the notable association with Coinbase. Coinbase is recognized globally as one of the most trusted cryptocurrency exchanges and companies, Coinbase effectively manages a diverse portfolio of crypto assets, solidifying its status as a cornerstone within the digital currency realm.
Positioned as a pivotal solution to address the persistent challenge of high transaction costs within the Ethereum network, the Base Chain stands quite firmly to revolutionize transaction fees, delivering a cost-effective alternative within the secure Ethereum environment. The assurance of a safe and reliable ecosystem is heightened by the affiliation with Coinbase, an industry titan renowned for its unwavering commitment and 10-year-long track record of great service.
Reasons To Trust The Base Chain
The current centralized phase of the Coinbase company, with its owners and Devs known to the public, establishes a solid foundation for users to place their trust in the Base chain. With over a decade of extensive experience in the cryptocurrency space, Coinbase has consistently demonstrated its expertise by developing and launching numerous successful crypto products.
This wealth of experience instills confidence in the Base Chain as it navigates its initial stages of centralization, with a strategic vision to progressively evolve into a decentralized entity over time.
For those embarking on their journey within the Base Chain ecosystem, it is imperative to keep certain key considerations in mind. Firstly, the association with Coinbase serves as a testament to the network’s reliability and credibility. Additionally, users can anticipate ongoing enhancements and decentralization initiatives as the Base Chain matures, aligning with the broader ethos of blockchain technology.
In summary, the Base Network, fortified by its affiliation with Coinbase, emerges as a promising Ethereum Layer 2 solution, poised to alleviate the burden of high transaction costs while providing a secure and gradually decentralized environment.
Key Features To Note About Base Chain
- Absence of Native Token: Notably, the Base Chain currently operates without a native token. Instead, transaction fees within the ecosystem are conducted using Base ETH. This choice streamlines interactions on the Base Chain and positions it as a unique player within the cryptocurrency landscape on the Ethereum chain. Some chain accepts their native token for gas fees but the Base chain accepts Base ETH.
- Layer 2 Security Powered by Ethereum: The Base Chain distinguishes itself as a layer 2 chain, constructed upon the robust Ethereum technology. This strategic integration ensures a heightened level of security, leveraging the well-established reputation of Ethereum as one of the most secure technologies in the crypto community. Consequently, the Base Chain is anticipated to offer a security profile close to the Ethereum Layer 1 network.
Related Reading: How To Buy, Sell, And Trade Tokens On The Avalanche Network
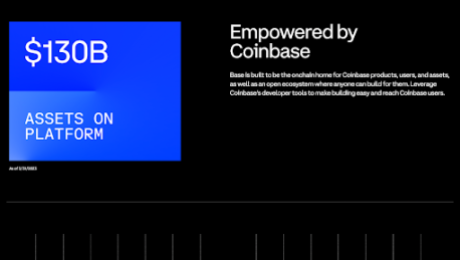
- Developer Transparency and Coinbase Backing: In contrast to many emerging chains, the Base Chain stands out due to its transparent development process and substantial backing by Coinbase. The association with Coinbase, a leading cryptocurrency exchange, lends credibility and trust. Considering Coinbase’s track record of providing crypto products to over 100 million users and processing $80 billion worth of crypto assets without controversies, users can confidently rely on the expertise of the development team.
- Anticipated Low Gas Fees: One of the attractive features of the Base Chain is the expectation of significantly lower gas fees compared to the native Ethereum chain. This affordability factor provides users with an opportunity to experience Ethereum Layer 1 compatibility at a fraction of the cost, enhancing the cost-effectiveness of transactions on the Base Chain.
- Open Source Technology with Optimism Integration: The Base Chain’s Open Source technology is powered by the Optimism Open Source chain. This integration not only supports the overall functionality of the chain but also simplifies the development process for creators. Developers can anticipate a user-friendly environment for building applications on the Base Chain, thanks to the enhanced capabilities and support provided by the Optimism Open Source chain.
Expanding on the diverse utilities and functionalities within the Base Ecosystem
- Bridging Utility: The Base Ecosystem has a bridging utility, facilitating seamless interoperability with other blockchain networks. This feature enhances the overall connectivity of the Base Chain, allowing for the fluid transfer of assets and data across different blockchain environments.
- DeFi (Decentralized Finance) Utility: Positioned at the forefront of decentralized finance, the Base Ecosystem provides comprehensive support for DeFi applications. Users can engage in a spectrum of financial services, including lending, borrowing, and trading, all within the secure and efficient framework of the Base Chain.
- Gaming Utility: Acknowledging the growing significance of blockchain in the gaming industry, the Base Ecosystem integrates a gaming utility. This functionality opens avenues for the development and deployment of blockchain-based games, ensuring a secure and transparent gaming experience for users.
- Social Utility: Recognizing the social aspect of blockchain technology, the Base Ecosystem incorporates a social utility. This facet enables the creation and deployment of decentralized social applications, fostering interactions, and transactions within a secure and trustless environment.
Related Reading: How To Buy, Sell, And Trade Tokens on The Polygon Network
- NFT (Non-Fungible Token) Utility: The Base Ecosystem extends its utility to support Non-Fungible Tokens (NFTs), a rapidly evolving and popular aspect of the blockchain space. Users can create, trade, and interact with NFTs seamlessly, leveraging the secure infrastructure of the Base Chain.
- Compatibility with EVM-Supported Wallets: The Base Ecosystem ensures widespread accessibility by allowing users to utilize and access its utilities through different Ethereum Virtual Machine (EVM) supported wallets. This compatibility enhances user convenience, as individuals can leverage familiar wallets to engage with the diverse utilities offered by the Base Chain.
How To Buy, Sell, And Trade On The Base Network
Select an EVM-Compatible Wallet
To be able to make any transactions on the Base network, you need to have an EVM-Compatible Wallet. Click here to see a list of wallet options you can select from but I would recommend you use MetaMask, it is one of the most popular Ethereum Virtual Machine (EVM)-compatible wallets and also one of the most used wallets for Base Network transactions.
If you are using a PC, install the Metamask wallet extension by clicking on “Add to Chrome” to add the extension to your Chrome browser, as shown below:

Once installed, open your MetaMask, set up your account, and make sure to keep your secret phrase very safe, I would advise that you write it down on a shit of paper, away from the internet where it can’t be hacked.
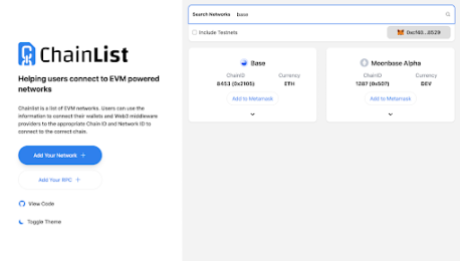
Add The BASE Network To Your MetaMask
To add the Base Network to your MetaMask, search for Chainlist on your browser, open it, connect your MetaMask wallet, search for Base, and add it to MetaMask by clicking on “Add to Metamask”, click on “Approve” and lastly click on “Switch Network” on your Metamask.
Acquire Base ETH
To make any transaction on the Base Network, you need Base ETH. Get your Base ETH from these cryptocurrency exchanges such as Binance, OKX, or KuCoin. Buy ETH on these platforms, go to the withdraw section, making sure to choose the BASE network as your transfer Network, which automatically converts your ETH to Base ETH as it gets to the ETH wallet destination.
Related Reading: How To Buy, Sell, and Trade Tokens On The Arbitrum Network
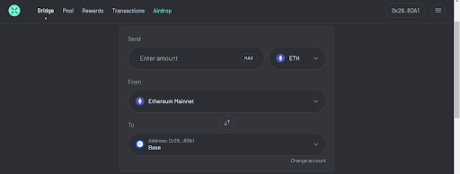
Alternatively, if you already have native ETH in your Metamask wallet, you can use the BASE bridge to bridge from the Ethereum Mainnet to the Base Network.
Bridging to Base Network ETH From Other Ethereum Layer 2s
If you wish to bridge your ETH to Base ETH from other Ethereum Layer 2 solutions, I would recommend secondary bridging platforms featured on the BASE Bridge platform. These platforms facilitate a smooth transition to the Base Network from various Ethereum Layer 2 environments, as shown below.
Example Of Bridging to Base ETH From Other Ethereum Layer 2s
ACROSS PROTOCOL is the first secondary bridging platform featured on the BASE Bridge platform as shown above, all you need to do is connect your Metamask wallet and select the amount of ETH you want to bridge to Base ETH and Bridge.
After Acquiring your Base ETH, you need to do your research and know which token you want to buy on the Base Network on Coingecko before heading over to Dexscreener to check for the token, Dexscreener serves as a valuable tool for checking available tokens on the EVM chain, including the Base Network.
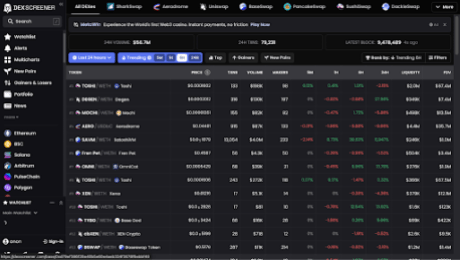
By selecting the Base network on Dexscreener, you can access a comprehensive chart of available Base tokens. Note that not all tokens are supported on every DeFi DEX, search for the token you would like to trade and select it. After selecting, look out for the Green Box section selected in the image to identify which DeFi platforms support the token you wish to trade.
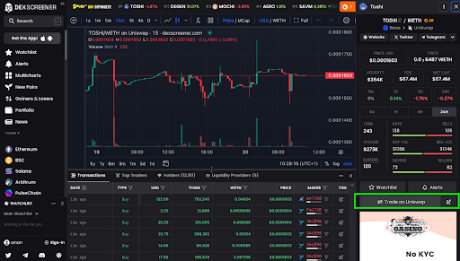
Obtaining Token Contract Address
Scroll down on the Dexscreener to find the token contract address or go back to Coingecko and copy the contract address. This address is crucial when trading on DeFi platforms.
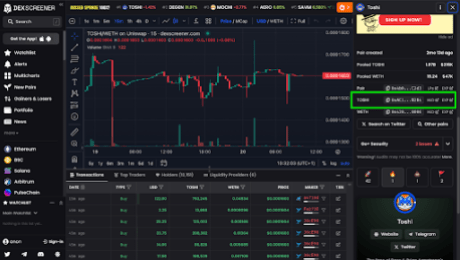
Copy the contract address, and when you enter it in the swap section of a DeFi platform like Uniswap, it will reveal the token. If the token is not available on Uniswap, the Dexscreener will redirect you to another supported DeFi where you can trade the token like KyberSwap.
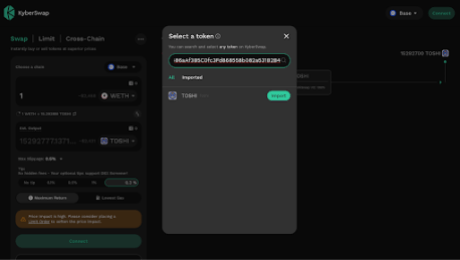
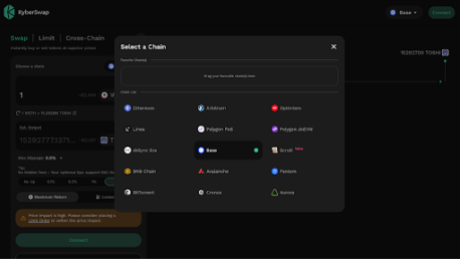
Connect your wallet to KyberSwap, click on the denominator token, and paste the contract address of the Base token in the search box. Before initiating any trade on DeFi, confirm that the network on the DeFi is on, in this case, the Base Network, ensuring the token’s availability on the Base Network. If it’s not initially on the Base Network, go to “Select a chain”, and select the Base network to ensure compatibility.
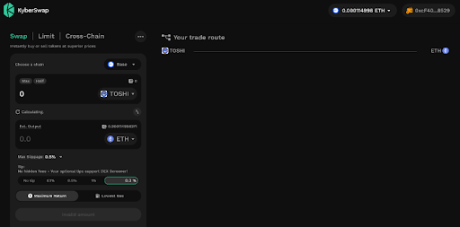
Choose the desired pair of Base tokens and ETH (or other base pairs), specify the amount you want to swap, and execute the trade.
Related Reading: How To Buy, Sell, And Trade Tokens On The BSC Network
Reverse Trading For Base Network ETH
If you wish to trade from a BASE token to Base ETH, simply reverse the order. Place the Base token at the top and the ETH at the bottom, then proceed with the swap. This allows you to exchange your Base token for ETH within the Base Network.
By following these steps, you can confidently navigate the trading process on the Base Network, leveraging the features of DeFi platforms and Dexscreener to make informed decisions and execute trades seamlessly.
Conclusion
The Base Network is another Ethereum Layer 2 network which is also affiliated with Coinbase, which is one of the most trusted cryptocurrency exchanges and companies in the crypto space with over 100 million users and processing $80 billion worth of crypto assets. Base Network has a lot of features which I have pointed out in the article already, although the Base Network does not have its Native token yet, it is still trusted and reliable due to its affiliation with Coinbase.
How To Buy, Sell, And Trade Crypto Tokens On The Cardano (ADA) Network
[toc]
The Cardano Network is a decentralized proof-of-stake blockchain platform with smart contract support and uses its own native token ADA, just like the Ethereum blockchain. Cardano is often described as the Ethereum killer. However, Cardano also considers itself the updated version of Ethereum, which is currently the king of all altcoins, including ADA.
Cardano (ADA) The Supposed Ethereum Killer
It has been said that Cardano has anointed itself as a third-generation crypto platform which it regards to Ethereum as the second generation. Cardano has deemed itself fit to be a threat or competitor to Ethereum as they are both similar in so many ways, including the fact that Cardano (ADA) was created by one of the co-founders of Ethereum, Charles Hoskinson.
As Ethereum is having a hard time with high gas fees issues and slow transaction times, Cardano is all set up to take their share and make a name for themselves in the NFT, DeFI, and Stablecoin market. Cardano aims to be scalable and low-cost for users compared to Ethereum, its major competitor.
It enables owners of their native token ADA to help operate the network and vote on changes to the software roles. A lot of developers now use the Cardano Blockchain for Smart contracts and building decentralized applications (dApps).
Cardano Continues To Evolve: Hard Forked From Byron To Shelley
Cardano has been releasing its blockchain in stages with the aim of releasing better, cleaner, and more secure codes. They continued to evolve as the Cardano blockchain hard forked from Byron, a federated and static model, to Shelley, a more dynamic and decentralized model
A hard fork means or is described as a radical change in the blockchain, but in the case of Cardano, The blockchain hard fork was unique because instead of the blockchain radical change, it ensured a smooth transition from the old protocol to a new protocol while saving the history of the previous blocks. This means the Cardano blockchain contains the Byron blocks and after a certain transaction period, it adds the Shelley blocks.
Shelley was upgraded, and the Shelley protocol upgrade added a new feature that enabled different kinds of Smart contract use cases, which included the creation and transactions with multi-asset tokens. It also established support for the Voltaire voting mechanism. The Shelley protocol hard fork upgrade of March 2021 called “Mary” introduced native token and multi-asset support on the Cardano Blockchain.
Mary allows users to create their own tokens that run on the Cardano network natively, just like Cardano’s native token ADA. Similar to the ERC20 tokens that can be created and transacted on the Ethereum network, Native tokens will open up this same functionality to Cardano.
How Does Cardano (ADA) Work?
The Cardano (ADA) Blockchain is made up of two main components, which are the Cardano Computational Layer (CCL) and the Cardano Settlement Layer (CSL).
The Cardano Computational Layer (CCL):
The Cardano Computational Layer (CCL) consist of the Ouroboros consensus protocol and Proof of stake, which are the backbone of the Cardano blockchain. They help to run smart contracts, it also ensures compliance and security. Lastly, allow other key advanced features and functionalities such as identity recognition and blacklisting.
The Cardano Settlement Layer (CSL):
The Cardano Settlement Layer (CSL) serves as the accounting layer of the Cardano blockchain where its native token holders can send and receive their ADA immediately with minimal transaction fees.
Blockchain Industry Issues Cardano Aims To Solve
- To create a secure voting mechanism for token holders.
- To Separate accounting and computation layers.
- To create an infinitely scalable consensus mechanism.
- To use mathematics to provide a provably secure blockchain that is less susceptible to attacks.
Benefits And Advantages of Cardano (ADA) Blockchain
Decentralization: The Cardano network is designed to promote decentralization, and the founder of ADA Charles Hoskinson, is confident that the network would be 50 to 100 times more decentralized than Bitcoin.
High scalability: The recent Cardano Blockchain Vasil hard fork solves scalability issues as it introduced critical updates that streamline transaction processing, ultimately increasing the transactions per second (tps) Cardano’s blockchain can handle to significantly boost transaction processing speeds, unlike Ethereum.
Multilayer security measures: Cardano has a multilayer architecture that separates the computation layer from the accounting layer and also the Ouroboros proof of stake algorithm reduces the surface attack and ensures good security without falling short on decentralization.
Low gas fees: Unlike Ethereum, Cardano has low transaction or gas fees which makes it more appealing to users and developers.
Environmentally friendly ecosystem: Cardano is designed to be accessible to all persons, no matter their level of skill, from novices to advanced users.
Strong Community: A project is as strong as its community and Cardano has a strong community of active users, developers, researchers, and founders all work together to make the project a very good one.
How To Buy, Sell, And Trade Crypto Tokens On The Cardano (ADA) Network
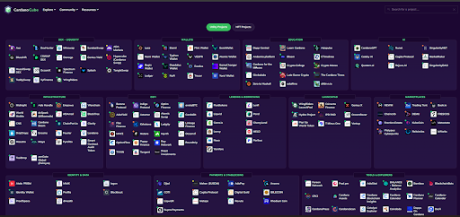
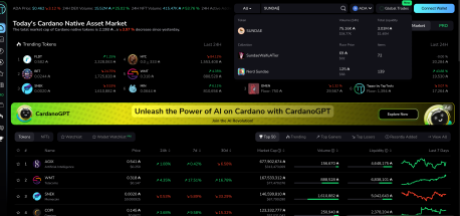
To see a full picture of the Cardano ecosystem, go to CardanoCube. CardanoCude has information on the applications on the Cardano Blockchain, ranging from DEXes to Liquidity to Wallets, Marketplaces, DeFI, Infrastructure, and Launchpads, in case you want to launch a project on the Cardano Blockchain. There are also Metaverse platforms, Gaming platforms, AI tools, Community & DAO, Developer Tools, Meme Coin, and so many more.
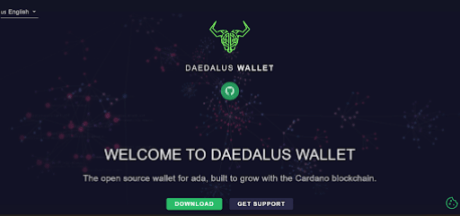
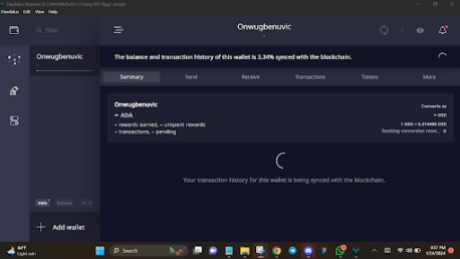
To buy and sell tokens on the Cardano (ADA) network, you need to get a wallet. The official wallet created by the Cardano developer IOG is called DAEDALUS. DAEDALUS is a desktop or PC secure wallet for the ADA cryptocurrency that downloads a full copy of the Cardano Blockchain, and it independently validates every transaction in its history, ensuring maximum security.
How To Install, Set Up, and Use DAEDALUS Wallet
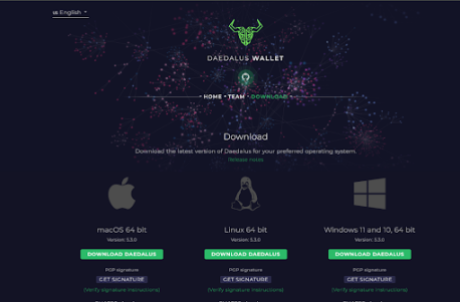
Make sure you download the installation file from the DAEDALUS official website daedaluswallet.io. Once the website is open, click on “Download” and then choose your operating system: either macOS, Linux, or Windows. Start the downloading process by clicking on “Download DAEDALUS.”
Install it, and once DAEDALUS is launched, you will need to configure the general settings and click on “Continue.” Read, and accept the terms and conditions.
Please note that the blockchain must be completely synced before you can use your wallet.
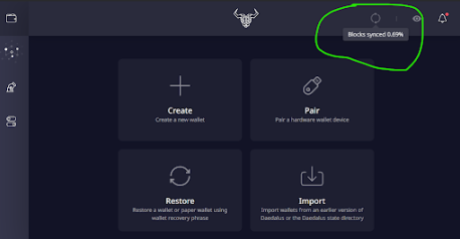
To create a new wallet, click on the “Create” button, give your wallet a “Name,” and Create your “Spending password”. You will need your spending password later to make transactions. It will also Encrypt your wallet file in the dataless directory.
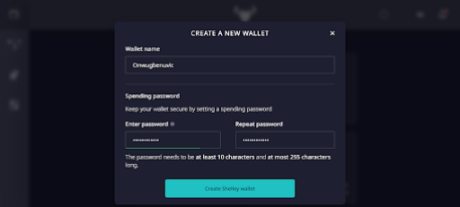
After the setup, the “Recovery phase” page will pop up, and you will be given the 24-word secret phrase that you can use to recover your account in case your laptop is stolen or broken.
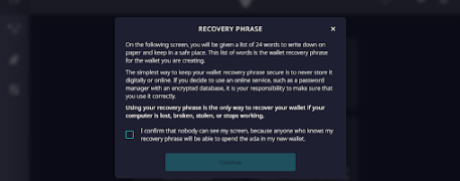
Ensure to write down your secret phrase and keep it in a safe place, after verifying your secret phrase your wallet is all set up.
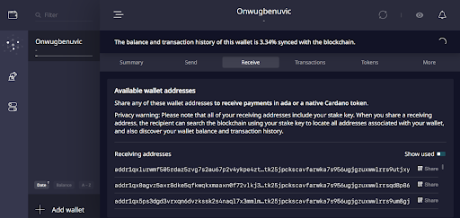
Click on “Send” to send coins and Click on “Receive” to receive coins, select one of the automatic recipient addresses to receive your coins for other exchanges.
How To Use The Wallet Function On Minswap Instead Of Daedalus
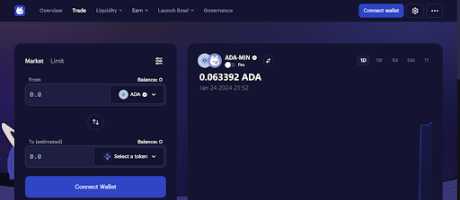
Minswap is a multi-pool decentralized exchange (DEX) on Cardano (ADA) where you can swap tokens with minimal time, cost, and maximum ease.
The Minswap website is user-friendly and easy to trade on. Go to the website, click on “Trade,” then click on “Connect wallet.”
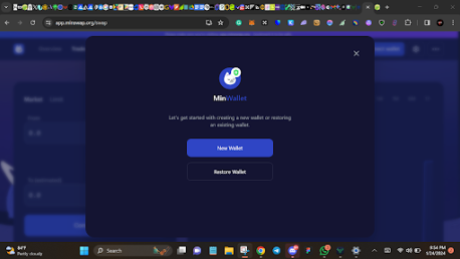
You might not see the DAEDALUS wallet there, so just create a “MinWallet” by clicking on it, then click on “New Wallet.” Copy your 24-word secret phrase down, write it down in a safe place, verify your secret phrase, create your MinWallet password, Now your MinWallet is ready to be used.
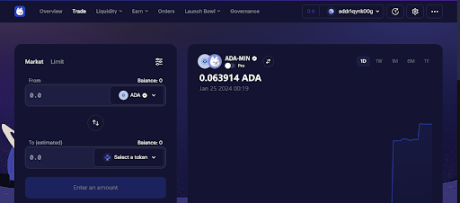
How To Buy ADA On Centralized Exchanges And Send To Your MinWallet
You need some ADA tokens in your wallet to make your transactions. You can buy your ADA from centralized exchanges (CEX) like ByBit, Binance, OKX, and MEXC, etc. In this case, we will use Binance.
Once the ADA is purchased, copy your MinWallet address, go to Binance, buy your ADA, and then go to “Withdraw.” Paste the MinWallet address you copied in the box to input your address, and Cardano will be automatically filled as your transfer network. Input the amount of ADA you want to transfer, then click on the “Withdraw” button.
How To Trade Crypto Tokens On MinSwap
To buy tokens, go to Coingecko and search for the token on the Cardano Blockchain Network you want to buy. Alternatively, you can go to the social media pages of the token you want to make sure you have the correct coin. Go back to MinSwap, click on the denominator token button, input the name of the token you want to buy, and select it.
Input the amount of ADA you want to swap for that token and swap it. If you want to sell, just switch their positions and swap.
Checking Prices Of Cardano-Based Tokens
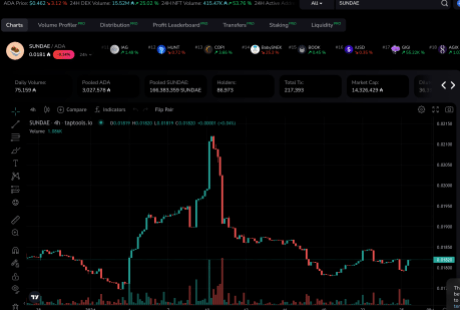
Knowing how to check the price action of tokens when trading on blockchains such as Cardano is important for investors to make the best decisions. For the Cardano network, data trackers such as TapTools is the one-stop-shop for all things Cardano charts.
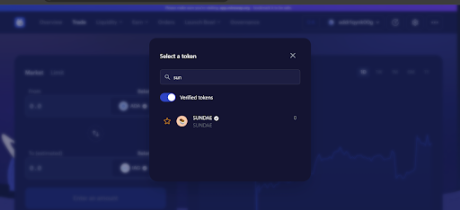
Just go to TapTools, click the Search bar, and input the name of the token you want to check. In this case, we’re using SUNDAE.
Choose the correct token and click on it, and TapTools will show you the price chart for that token. By using TapTools, you will be able to keep track of the price and follow how your token is doing, as shown below:
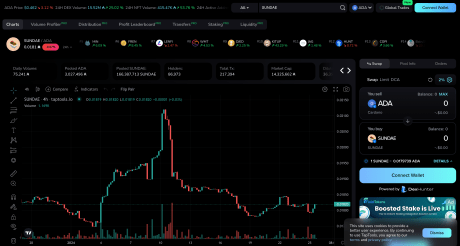
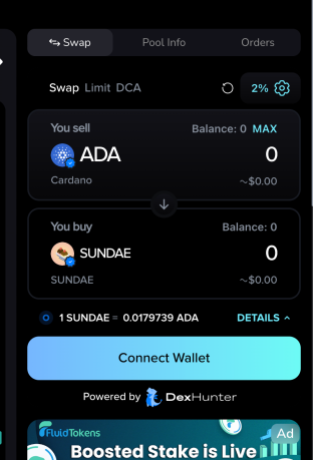
Interestingly, TapTools also has its own inbuilt decentralized exchange (DEX) for those who want to do everything in the same place. All you have to do is connect your wallet similarly to connecting to MinSwap as illustrated above, pick the token you want to swap to, enter the amount of ADA you want to swap, and click “Swap”. The DEX is visible on the right-hand side when you open the chart of a token.
Conclusion
Trading on the Cardano (ADA) network is quick and seamless due to its fast transaction speeds and low fees. However, like with any crypto trading, it does carry its own risk, which could be a partial or total loss of capital.
How To Buy, Sell, And Trade Crypto Tokens On The Cardano (ADA) Network
[toc]
The Cardano Network is a decentralized proof-of-stake blockchain platform with smart contract support and uses its own native token ADA, just like the Ethereum blockchain. Cardano is often described as the Ethereum killer. However, Cardano also considers itself the updated version of Ethereum, which is currently the king of all altcoins, including ADA.
Cardano (ADA) The Supposed Ethereum Killer
It has been said that Cardano has anointed itself as a third-generation crypto platform which it regards to Ethereum as the second generation. Cardano has deemed itself fit to be a threat or competitor to Ethereum as they are both similar in so many ways, including the fact that Cardano (ADA) was created by one of the co-founders of Ethereum, Charles Hoskinson.
As Ethereum is having a hard time with high gas fees issues and slow transaction times, Cardano is all set up to take their share and make a name for themselves in the NFT, DeFI, and Stablecoin market. Cardano aims to be scalable and low-cost for users compared to Ethereum, its major competitor.
It enables owners of their native token ADA to help operate the network and vote on changes to the software roles. A lot of developers now use the Cardano Blockchain for Smart contracts and building decentralized applications (dApps).
Cardano Continues To Evolve: Hard Forked From Byron To Shelley
Cardano has been releasing its blockchain in stages with the aim of releasing better, cleaner, and more secure codes. They continued to evolve as the Cardano blockchain hard forked from Byron, a federated and static model, to Shelley, a more dynamic and decentralized model
A hard fork means or is described as a radical change in the blockchain, but in the case of Cardano, The blockchain hard fork was unique because instead of the blockchain radical change, it ensured a smooth transition from the old protocol to a new protocol while saving the history of the previous blocks. This means the Cardano blockchain contains the Byron blocks and after a certain transaction period, it adds the Shelley blocks.
Shelley was upgraded, and the Shelley protocol upgrade added a new feature that enabled different kinds of Smart contract use cases, which included the creation and transactions with multi-asset tokens. It also established support for the Voltaire voting mechanism. The Shelley protocol hard fork upgrade of March 2021 called “Mary” introduced native token and multi-asset support on the Cardano Blockchain.
Mary allows users to create their own tokens that run on the Cardano network natively, just like Cardano’s native token ADA. Similar to the ERC20 tokens that can be created and transacted on the Ethereum network, Native tokens will open up this same functionality to Cardano.
How Does Cardano (ADA) Work?
The Cardano (ADA) Blockchain is made up of two main components, which are the Cardano Computational Layer (CCL) and the Cardano Settlement Layer (CSL).
The Cardano Computational Layer (CCL):
The Cardano Computational Layer (CCL) consist of the Ouroboros consensus protocol and Proof of stake, which are the backbone of the Cardano blockchain. They help to run smart contracts, it also ensures compliance and security. Lastly, allow other key advanced features and functionalities such as identity recognition and blacklisting.
The Cardano Settlement Layer (CSL):
The Cardano Settlement Layer (CSL) serves as the accounting layer of the Cardano blockchain where its native token holders can send and receive their ADA immediately with minimal transaction fees.
Blockchain Industry Issues Cardano Aims To Solve
- To create a secure voting mechanism for token holders.
- To Separate accounting and computation layers.
- To create an infinitely scalable consensus mechanism.
- To use mathematics to provide a provably secure blockchain that is less susceptible to attacks.
Benefits And Advantages of Cardano (ADA) Blockchain
Decentralization: The Cardano network is designed to promote decentralization, and the founder of ADA Charles Hoskinson, is confident that the network would be 50 to 100 times more decentralized than Bitcoin.
High scalability: The recent Cardano Blockchain Vasil hard fork solves scalability issues as it introduced critical updates that streamline transaction processing, ultimately increasing the transactions per second (tps) Cardano’s blockchain can handle to significantly boost transaction processing speeds, unlike Ethereum.
Multilayer security measures: Cardano has a multilayer architecture that separates the computation layer from the accounting layer and also the Ouroboros proof of stake algorithm reduces the surface attack and ensures good security without falling short on decentralization.
Low gas fees: Unlike Ethereum, Cardano has low transaction or gas fees which makes it more appealing to users and developers.
Environmentally friendly ecosystem: Cardano is designed to be accessible to all persons, no matter their level of skill, from novices to advanced users.
Strong Community: A project is as strong as its community and Cardano has a strong community of active users, developers, researchers, and founders all work together to make the project a very good one.
How To Buy, Sell, And Trade Crypto Tokens On The Cardano (ADA) Network
To see a full picture of the Cardano ecosystem, go to CardanoCube. CardanoCude has information on the applications on the Cardano Blockchain, ranging from DEXes to Liquidity to Wallets, Marketplaces, DeFI, Infrastructure, and Launchpads, in case you want to launch a project on the Cardano Blockchain. There are also Metaverse platforms, Gaming platforms, AI tools, Community & DAO, Developer Tools, Meme Coin, and so many more.
To buy and sell tokens on the Cardano (ADA) network, you need to get a wallet. The official wallet created by the Cardano developer IOG is called DAEDALUS. DAEDALUS is a desktop or PC secure wallet for the ADA cryptocurrency that downloads a full copy of the Cardano Blockchain, and it independently validates every transaction in its history, ensuring maximum security.
How To Install, Set Up, and Use DAEDALUS Wallet
Make sure you download the installation file from the DAEDALUS official website daedaluswallet.io. Once the website is open, click on “Download” and then choose your operating system: either macOS, Linux, or Windows. Start the downloading process by clicking on “Download DAEDALUS.”
Install it, and once DAEDALUS is launched, you will need to configure the general settings and click on “Continue.” Read, and accept the terms and conditions.
Please note that the blockchain must be completely synced before you can use your wallet.
To create a new wallet, click on the “Create” button, give your wallet a “Name,” and Create your “Spending password”. You will need your spending password later to make transactions. It will also Encrypt your wallet file in the dataless directory.
After the setup, the “Recovery phase” page will pop up, and you will be given the 24-word secret phrase that you can use to recover your account in case your laptop is stolen or broken.
Ensure to write down your secret phrase and keep it in a safe place, after verifying your secret phrase your wallet is all set up.
Click on “Send” to send coins and Click on “Receive” to receive coins, select one of the automatic recipient addresses to receive your coins for other exchanges.
How To Use The Wallet Function On Minswap Instead Of Daedalus
Minswap is a multi-pool decentralized exchange (DEX) on Cardano (ADA) where you can swap tokens with minimal time, cost, and maximum ease.
The Minswap website is user-friendly and easy to trade on. Go to the website, click on “Trade,” then click on “Connect wallet.”
You might not see the DAEDALUS wallet there, so just create a “MinWallet” by clicking on it, then click on “New Wallet.” Copy your 24-word secret phrase down, write it down in a safe place, verify your secret phrase, create your MinWallet password, Now your MinWallet is ready to be used.
How To Buy ADA On Centralized Exchanges And Send To Your MinWallet
You need some ADA tokens in your wallet to make your transactions. You can buy your ADA from centralized exchanges (CEX) like ByBit, Binance, OKX, and MEXC, etc. In this case, we will use Binance.
Once the ADA is purchased, copy your MinWallet address, go to Binance, buy your ADA, and then go to “Withdraw.” Paste the MinWallet address you copied in the box to input your address, and Cardano will be automatically filled as your transfer network. Input the amount of ADA you want to transfer, then click on the “Withdraw” button.
How To Trade Crypto Tokens On MinSwap
To buy tokens, go to Coingecko and search for the token on the Cardano Blockchain Network you want to buy. Alternatively, you can go to the social media pages of the token you want to make sure you have the correct coin. Go back to MinSwap, click on the denominator token button, input the name of the token you want to buy, and select it.
Input the amount of ADA you want to swap for that token and swap it. If you want to sell, just switch their positions and swap.
Checking Prices Of Cardano-Based Tokens
Knowing how to check the price action of tokens when trading on blockchains such as Cardano is important for investors to make the best decisions. For the Cardano network, data trackers such as TapTools is the one-stop-shop for all things Cardano charts.
Just go to TapTools, click the Search bar, and input the name of the token you want to check. In this case, we’re using SUNDAE.
Choose the correct token and click on it, and TapTools will show you the price chart for that token. By using TapTools, you will be able to keep track of the price and follow how your token is doing, as shown below:
Interestingly, TapTools also has its own inbuilt decentralized exchange (DEX) for those who want to do everything in the same place. All you have to do is connect your wallet similarly to connecting to MinSwap as illustrated above, pick the token you want to swap to, enter the amount of ADA you want to swap, and click “Swap”. The DEX is visible on the right-hand side when you open the chart of a token.
Conclusion
Trading on the Cardano (ADA) network is quick and seamless due to its fast transaction speeds and low fees. However, like with any crypto trading, it does carry its own risk, which could be a partial or total loss of capital.
How To Buy, Sell, And Trade Tokens On The Optimism Network
Optimism (OP) is a Layer 2 network that solves Ethereum’s scalability issues, bringing low fees and faster transactions to users. Scalability and low gas fees have always been Ethereum’s major problems. This is because, amid the trilemma of crypto, where security, decentralization, and scalability are not equal, Ethereum chose more security than decentralization and more decentralization than scalability to focus on. This is the reason Ethereum has a lot of layer 2s to help solve the scalability difficulties.
Over the years, people have had to spend huge amounts of ETH gas to perform a transaction, but no one really cared at the time because the value of ETH was small. For example, spending 0.001 ETH when ETH was worth $300 means that you were spending $0.03 on gas fees, which was cheap.
This was also at a time when the network was less congested, but over time, the value of ETH increased from $300 to over $2,000. In a more congested period, users have found it could cost upwards of $80 in gas fees to approve a transaction on the Ethereum chain.
OP network is one of the Layer 2 fixes for ETH
What better way to solve this issue than to introduce the Ethereum Layer 2s, which will give you almost the same properties as Ethereum but is expected to be better in what Ethereum is lacking. Ethereum is lacking in the scalability aspect, some of the layer 2s are helping to fill the void while some are not. One layer 2 Ethereum chain that is helping to feel the void is the Optmism chain.
Ethereum is great, but imagine not wanting to transact on the chain because you feel the gas fee is too expensive. It’s like spending $50 on a delivery fee to buy a $10 item. Although Ethereum boasts of strong security, some people still detest the expensive gas fee and decide to build on other chains.
Optimism (OP) Network Benefits: Cheap gas fees and lightning-fast transaction speed
Optimism is an Ethereum rollup that is known for cheap gas fees and lightning-fast transaction speed. Using the chain to transact will make you appreciate it so much and will make you want to transact on the chain regularly.
If you were used to paying $10 on gas fees on the ETH network, you would appreciate the Optimism network more, as you would spend less than $0.01 on gas fees. The Optimism Network is one of the most successful Ethereum layer 2 chains, with a very successful airdrop of its native token called Optimism (OP), which can be traded on centralized exchanges.
Important things to know about the Optimism Ecosystem:
Let’s explore the Optimism ecosystem to help you know how to navigate and use the decentralized applications (DApps) on the network, which keeps you safe from falling for fake sites and phishing links.
The optimism mainnet chain uses optimism ETH, opETH, for gas fees. Tokens on the chain are sometimes represented as opX, where X represents the token. For instance, if you have Bitcoin on the Optimism chain, it is represented as opBTC, so Ethereum on the Optimism chain is opETH.
How to Buy, Sell, and Trade Tokens on the Optimism Chain or Network:
To buy any token on the optimism chain, you need optimism ETH; you can get OPETH in two ways: through the centralized or the decentralized way. Let’s talk about the centralised way first because it doesn’t require much effort.
If you have a Binance account, Bybit, Kucoin, or HTX, and you have some USDT, you can trade the USDT for ETH. Then, withdraw the ETH on the Optimism network to your EVM wallet like Metamask.
Decentralized Way To Buy Optimism (OP)
To get opETH the decentralised way, you would need to know what wallets to use. Optimism network supports varieties of EVM wallets. Here are some EVM wallets that are compatible with Optimism network; we have Metamask, which’s the universal EVM wallet, Trustwallet, Coinbase Web 3 wallet, Rainbow wallet, Brave wallet, Taho wallet, OKX Web 3.0 wallet, Rabby Wallet, Zerion wallet, and lots more. Check here for the full list of Optimism ecosystem wallets.
How to Bridge to Optimism Network:
You should have your compatible EVM wallet and your ETH in wallet ready, the next step is to bridge your ETH. There are different ways to bridge your ETH. You can use native ETH or other layer 2 ETH, and you can get native ETH from centralized exchanges or through P2P from your local crypto vendor.
You can also get native ETH by buying directly from Metamask like this:
Go to Metamask portfolio and connect your Metamask wallet or whatever EVM wallet you have. Choose your location, and select a payment method. After that, you can select the coin you want to do, this method gives you a variety of coins on different chains.
You can select ETH on the optimism chain and easily get the ETH on the optimism chain, this way it’s easier for you to get ETH on the optimism chain or any other chain without using any centralized crypto platform. The downside to this is the spread; you can spend $100 only to end up getting $75 worth of ETH, and the rest will be used for charges.
However, if you already have native ETH or ETH on Arbitrum or any other layer 2 chains, you can bridge in two ways.
Bridging using the Optimism native bridge: With this, you can bridge from the available ETH networks to the Optimism network. This bridge primarily supports bridging from native ETH to optimism but doesn’t primarily support other chains to the optimism chain. So it uses a secondary bridging platform like hop protocol, stargate, and more.
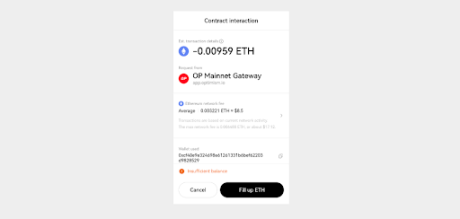
Using the Optimism bridge is pretty easy, but you will have to have native ETH in your wallet. Go to the site, connect your wallet to the site, and review the deposit.
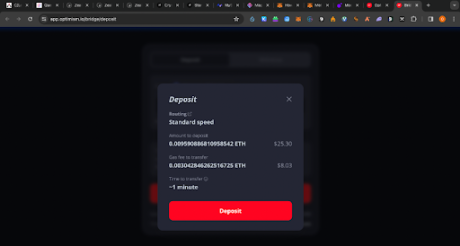
From the review deposit, you will see that you have to pay a gas fee to the optimism chain. This gas fee is for the optimism chain, and after paying that, you still need to pay another gas fee to initiate the transaction, depending on the gas fee congestion at that moment.
For instance, the gas fee congestion states I pay an extra $8.51 because the Ethereum chain has a high gas fee.
So if you do the math, you will notice that we have spent over $16 just to bridge from the Ethereum mainnet to the optimism chain. This is why we need to consider the other bridging option, which is bridging using the secondary bridging platforms.
There are varieties of secondary bridging platforms you can use, and each of them has its different bridging fees.
Bridging using the Optimism app bridge: You can access all the secondary bridging platforms on the Optimism app bridge https://www.optimism.io/apps/bridges. Even though most of them are cheaper than the native bridge option, you have to do your research and find the cheapest with the fastest transaction time.
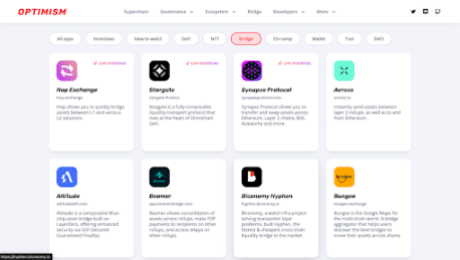
Most of them are pretty easy to use, and some recommendations include Orbiter. finance, Bungee, and Layerswap. Transactions on these platforms are pretty cheap and can support bridging from other chains.
Enter their sites from the Optimism bridging apps, choose any of your choices, connect to your wallet, select what network you want to bridge to the optimism chain, approve, and bridge.
How to Find and Trade Tokens on the Optimism Chain:
With your optimism ETH in your wallet, let’s trade. To trade on the optimism chain, you need to know what to trade. On the optimism chain, you can only trade tokens on the optimism chain. To find tokens on the Optimism, you will have to use Dexscreener.
Dexscreener is an on-chain tracker used to check most EVM and non-EVM coins and tokens. However, we will be focusing on the optimism chain right now, so navigate to the Optimism chain Dexscreener.
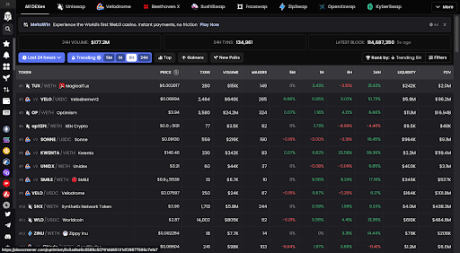
You can see a variety of tokens to trade on the optimism chain. If you have a specific optimism token in mind, you can type the name in the search button. If you don’t know the name of the token but have the smart contract address, you can also input that and the token will be displayed.
From Dexscreener, you can also find the token contract address just by clicking the token name on Dexscreener.
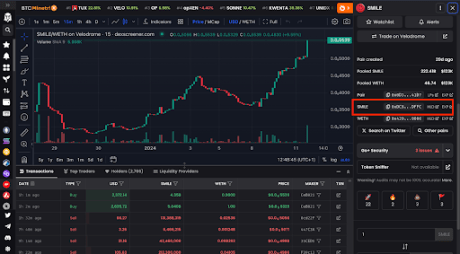
For Instance, click on any token, scroll down and you will see the contract address, just like Smile in the red box.
Now you know how to get token smart contracts, it’s time to trade them. There are different DEXes to trade these tokens, as shown below:
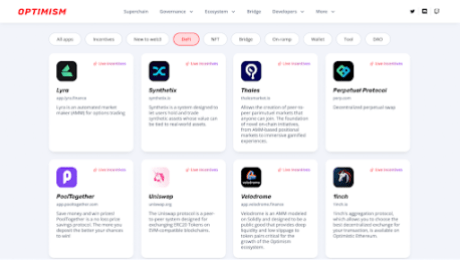
Check the Optimism Defi Section to select which DEX to use. People mostly use the Uniswap DEX, 1INCH DEX, and Sushi Swap.

Let’s use SushiSwap to show how to trade optimism tokens on the optimism network. Go to the SushiSwap swap section. Connect your wallet and change the network to the optimism network.
If you want to swap opETH for any optimism token, click on the denominator side, input the contract address of the token, and approve the token. Now you can trade.
Conclusion
The Optimisim network is just like any other decentralized network when it comes to trading and buying these tokens carry their own unique risks. A lot of the tokens on decentralized exchanges are new, and are therefore untested. So when trading these tokens, always risk what you are willing to lose in the event a project does turn out to be a scam or a rug.
How To Buy Sell and Trade Tokens On The Arbitrum Network
The Arbitrum (ARB) network is a Layer 2 scaling solution for Ethereum that aims to address the scalability and high transaction fees. It is developed by Offchain Labs and utilizes a technology called Optimistic Rollups to achieve its objectives.
Optimistic Rollups work by processing most transactions off-chain and then periodically submitting a summary of those transactions to the Ethereum mainnet. This approach reduces the transaction costs significantly and increases the throughput of the network while maintaining the security guarantees of the Ethereum mainnet.
In other words, the optimistic rollup feature allows Ethereum smart contracts to scale by passing messages between smart contracts on the Ethereum main chain and those on the Arbitrum second layer chain. Much of the transaction processing is completed on the second layer, and the results of this are recorded on the main chain — drastically improving speed and efficiency.
One of the key features of the Arbitrum network is its compatibility with existing Ethereum smart contracts. Developers can deploy their contracts on the Arbitrum network with minimal modifications, allowing for easy migration of decentralized applications (dApps) from Ethereum to Arbitrum.
Also, the arrival of the Ethereum network introduced a groundbreaking transformation in the realm of blockchain technology, providing a platform for the creation of decentralized applications (dApps) and propelling the growth of decentralized finance (DeFi). Nevertheless, as Ethereum’s preeminence soared, it encountered hurdles related to scalability and exorbitant transaction fees.
This is where the Arbitrum network enters the picture as a Layer 2 scaling solution, poised to tackle these challenges while ensuring seamless integration with Ethereum’s ecosystem. In this article, we will explore the core features of the Arbitrum network and examine its immense potential in the Ethereum ecosystem.
Features Of Arbitrum Network
The promise of Scalability:
Scalability has long been a bottleneck for Ethereum, causing network congestion and skyrocketing transaction fees during times of high demand. Arbitrum tackles this challenge by implementing Optimistic Rollups, a technology that allows for most transactions to be processed off-chain. By aggregating multiple transactions into a single summary, ARB achieves significant scalability improvements, enabling faster confirmation times and a higher throughput. This scalability boost unlocks the potential for a more efficient and seamless user experience on the Ethereum network.
Ecosystem and Adoption:
The Arbitrum network has garnered significant attention and interest within the Ethereum ecosystem. Several prominent projects and protocols have announced plans to deploy on Arbitrum or explore integrations. This growing ecosystem includes decentralized exchanges (DEXs), lending platforms, gaming applications, and more.
The increased adoption of Arbitrum provides users with a wider range of options for interacting with decentralized applications (DApps) and accessing various DeFi services.
Smart Contract Execution:
Arbitrum Network makes use of a technique called optimistic execution to process smart contracts. It assumes that most transactions are valid and executes them off-chain. This enables the network in providing fraud proofs, which allows anyone to challenge invalid transactions by submitting evidence to the Ethereum mainnet. This approach enables efficient and secure smart contract execution.
Decentralization and Security:
While Arbitrum relies on the Ethereum mainnet for final settlement and security, it maintains a high level of decentralization and security. By leveraging Ethereum’s robust consensus mechanism, Arbitrum benefits from the security guarantees of the Ethereum network. The periodic submission of transaction summaries to Ethereum ensures that any potential fraudulent activity can be detected and resolved.
Seamless User Experience:
Using the Arbitrum(ARB) network is designed to be seamless for users. They can continue using their existing Ethereum wallets, such as MetaMask, to interact with the Arbitrum network. This familiarity and compatibility make it easier for users to transition from Ethereum to Arbitrum and enjoy the benefits of improved scalability and reduced transaction fees without significant changes to their workflows.
What Makes Arbitrum Unique?
The Arbitrum (ARB) network is designed to provide an easy-to-use platform developers can use to launch highly efficient and scalable Ethereum-compatible smart contracts. It offers a range of exciting possibilities for developers and users alike. Some examples of what can be done on the network include:
High EVM compatibility
Arbitrum(ARB) is considered to be one of the most EVM-compatible rollups. It’s compatible with the EVM at the bytecode level, and any language that can compile to EVM works out of the box — such as Solidity and Vyper. This makes it easy to build on since developers do not need to get to grips with a new language before building on Arbitrum.
Decentralized Finance (DeFi) applications:
The Arbitrum (ARB) network can be used to build and run DeFi applications, such as decentralized exchanges (DEXs), lending and borrowing platforms, and stablecoin systems. These applications can benefit from the network’s fast transaction processing times and low gas fees, enabling efficient and affordable transactions.
Low transaction fees
As a Layer 2 scaling solution for Ethereum, Arbitrum isn’t just designed to boost Ethereum’s transactional throughput, it also minimizes transaction fees at the same time.
Thanks to its extremely efficient roll-up technology, Arbitrum is able to cut fees down to just a tiny fraction of what they are on Ethereum, while still providing sufficient incentives for validators.
Well-developed ecosystem
Arbitrum is already working with a wide variety of Ethereum DApps and infrastructure projects, including the likes of Uniswap.
Cross-Chain Interoperability
The Arbitrum (ARB) network can also be used to enable cross-chain interoperability between different blockchains. This could allow for the seamless transfer of assets and data between different blockchain ecosystems, enabling greater interoperability and connectivity across the entire blockchain space.
The Arbitrum network’s fast transaction processing times, low fees, and security and decentralization features make it a compelling choice for a wide range of use cases.
How To Get Started on The Arbitrum Network
To buy and sell tokens on the Arbitrum (ARB) network, you must first get a metamask wallet. MetaMask is a popular browser extension wallet commonly used for interacting with blockchain networks like Ethereum. It is available as a browser extension for popular browsers such as Google Chrome.
Ensure your Metamask Wallet has been added to your browser as an extension by clicking on the ‘Add to Chrome” icon on the top right as shown below:
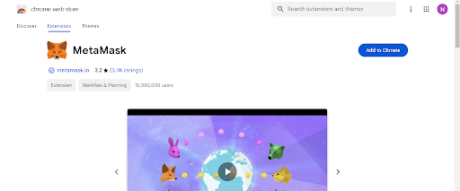
Once installed and set up, MetaMask allows users to manage their cryptocurrency wallets, interact with decentralized applications (DApps), and securely execute transactions on supported blockchain networks directly from their browsers. (Make sure to write down your seed phrase on a piece of paper and keep it in a safe place. Do not store it online or on your device).
Next, add the ARB network to your Metamask wallet by following the instructions provided on the Metamask website here.
Trading On the Arbitrum (ARB) Network
In order to execute trades on the ARB network, you will need to fund your wallet with Ethereum (ETH) so as to enable you to cover gas fees even though the majority of the trading activity takes place on the Arbitrum layer 2 solution. This is because the Arbitrum network periodically submits transaction summaries and proofs to the Ethereum mainnet, which requires paying Ethereum gas fees.
You can buy ETH on centralized exchanges such as Binance, copy your wallet address from Metamask, and then send the ETH from Binance to your Metamask wallet.
You can also purchase ETH directly within the Metamask wallet using traditional payment methods such as credit or debit cards, etc.
Just click on the “Buy/Sell” button within Metamask to open the interface. Here, you can put how much ETH (or any other token) you want to buy in terms of dollar terms, pick your payment method, and then click “Buy”.
Note that to buy crypto directly within Metamask, you will need to provide info such as your country and state. However, it is a straightforward process that only takes a minute.
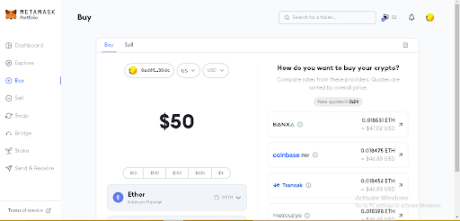
It’ll only take a couple of minutes at most for your ETH to arrive in your wallet. Once the ETH arrives, you are all set to begin trading tokens on the ARB network. So, head over to UniSwap to get started on your trading journey.
How To Trade Tokens On The ARB Network Using UniSwap
Uniswap is a decentralized exchange (DEX) protocol built on the Ethereum blockchain. It allows users to trade Ethereum-based tokens directly from their wallets without the need for intermediaries or traditional order books. Uniswap offers users a simple and straightforward way to buy and sell a wide variety of tokens.
Endeavour to be on the right Uniswap website to protect your wallet from any fraudulent activity. The first step is clicking on the “launch app” button at the top right corner, as shown in the image below:
The next step is clicking on the connect wallet option on UniSwap at the top right corner, as shown in the image below:
Connect to your preferred wallet as shown below. (In this case, it’s Metamask):
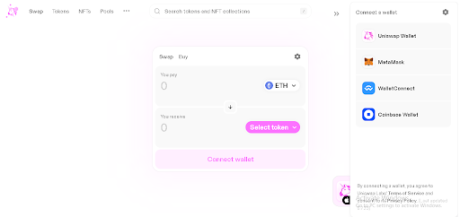
Once connected, switch Metamask to the ARB network. (If you’re already on the ARB network, you do not need to switch):
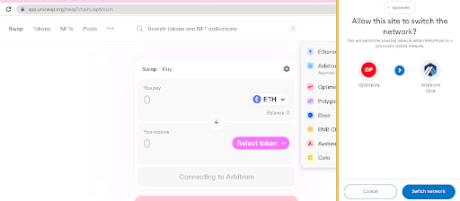
After connecting MetaMask to the ARB network, go to UniSwap, and then you can start trading on the ARB network using UniSwap.
The next step is to select your preferred tokens on the UniSwap interface and since Uniswap operates on a token to token trading model, click on the “select token” button to select the trading pair you want to trade against.
For example, if you want to buy USDT using ETH, select ETH – USDT, enter the amount, then click on “swap” or “trade now” and confirm the transaction in your Metamask wallet. You can view the tokens in your wallet’s asset list.
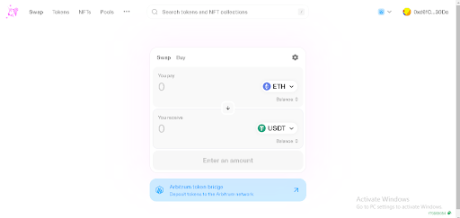
Buying and Selling Tokens with the Metamask Wallet
ARB Network users can also buy and sell tokens using the Metamask extension wallet already connected to the ARB network.
To do this, make sure you’re connected to the ARB network and have ETH to swap and pay for gas fees. Then, navigate to the “Swap” button as shown below. This will take you to the Swap interface inside Metamask.
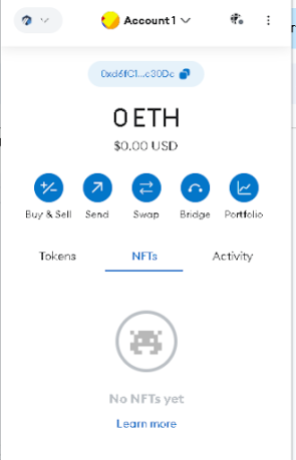
Using the image above as a guide, you can also search for tokens using the name or the contract address, just like on UniSwap. Input the amount of ETH you want to swap, confirm that you have the correct token, and then click “Swap.” Once the transaction is confirmed, the tokens you just bought will be sent to your wallet.
Tracking Token Prices on The Arbitrum Network
Users of the Arbitrum (ARB) network can take advantage of on-chain tools like Dexscreener to gain access to comprehensive market insights for specific tokens. These insights include price data and contract information, empowering users to make well-informed trading decisions based on reliable and up-to-date information.
With Dexscreener on the Arbitrum network, users can stay informed about token metrics and market dynamics, enhancing their trading strategies and overall trading experience.
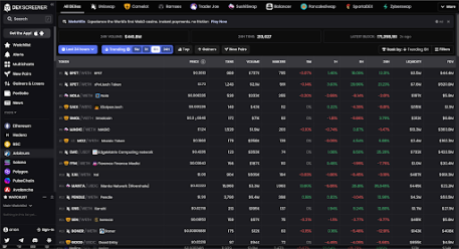
Dexscreener offers a variety of advantageous features tailored to users on the Arbitrum network. Among these features, an exceptional one is the charting functionality, which delivers both real-time and historical price data for a wide range of tokens.
By utilizing these charts, users gain valuable insights into price trends, trading volumes, and other pertinent metrics. This enables them to pinpoint potential entry or exit points for their trades with precision and confidence.
Take a look at the example below:
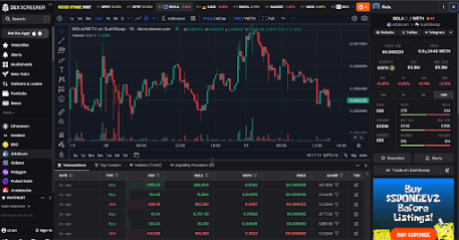
Conclusion
In conclusion, the Arbitrum network offers a compelling ecosystem for buying, selling, and trading tokens, providing several notable advantages over other platforms. With its seamless integration of on-chain tools like Dexscreener, users gain access to detailed market insights, real-time price data, and historical charts, enabling them to make informed trading decisions with confidence.
Additionally, Arbitrum’s scalability and low transaction fees enhance the overall trading experience, ensuring quicker and more cost-effective transactions. By leveraging the power of the Arbitrum network, traders can enjoy a secure, efficient, and feature-rich environment that empowers them to navigate the world of token trading with ease.
SUI Overtakes Bitcoin, Aptos To Become 13th-Largest DeFi Network
The SUI blockchain has been ramping up since the year 2024 began, and a natural consequence of this rapid growth is that it has now surpassed some major players in the decentralized finance (DeFi) space. This has put it ahead of heavy hitters such as Bitcoin and Aptos as SUI begins to leave its mark on the market.
SUI Network TVL Crosses $360 Million
The total value locked (TVL) on the SUI network has completely exploded in the last year. The total value locked on the blockchain was sitting at less than $12 million in the middle of 2024. But now, less than a month into the year 2024, the TVL has already crossed the $360 million mark.
While this figure is still far off from the likes of Ethereum and BSC which continue to dominate the DeFi TVL, it puts it ahead of some heavy hitters in the game. For example, the Bitcoin TVL is currently sitting at $298.8 million, which means SUI TVL is much higher than that of Bitcoin.
Then again, another network which is currently lagging behind SUI is the Aptos TVL. The Aptos blockchain, which was launched to much fanfare back in 2022, is sitting at a TVL of $133 million. This means that SUI’s TVL is more than 2x higher than that of Aptos.
Other DeFi networks which SUI has surged ahead of include the likes of Kava at a TVL of $251 million, Near at a TVL of $94 million, and Metis at a TVL of $124 million. With its TVL figures, SUI is now the 13th-largest DeFi network.
DeFi Making A Comeback
After a long stretch of poor performance, the DeFi market looks to be making its comeback in 2024. As DeFiLlama data shows, after the market peaked at a TVL of almost $245 billion in 2022, it dropped more than 50%, spending the majority of 2023 trailing below $70 billion.
However, as crypto market sentiment has improved, so has the DeFi TVL. The TVL has grown from its October 2023 lows of $47 billion to more than $72 billion so far in 2024. This is as a result of the likes of SUI gaining more adoption and their token prices also increasing.
As expected, Ethereum dominates the majority of this TVL, currently sitting at $43.743 billion. The Tron and BSC networks are the second and third-largest, with TVLs of $8.14 billion and $5.41 billion, respectively.
How To Buy, Sell, And Trade Tokens On The BSC Network
The captivating Binance Smart Chain (BSC) Network has morphed into a powerful force within the blockchain ecosystem, offering various benefits and opportunities for users and developers alike. Introduced by Binance, a top player in the global cryptocurrency exchange realm, BSC provides a robust and efficient infrastructure for decentralized applications (dApps) and digital asset transactions.
The key advantage of the BSC network is its high-speed and low-cost transactions. With its standout consensus mechanism, BSC achieves fast block confirmations, enabling quick and seamless transfers of digital assets. This scalability advantage makes BSC an attractive choice for users who value speed and efficiency in their transactions.
Advantages Of The Binance Smart Chain (BSC) Network
The Binance Smart Chain (BSC) offers several advantages that have contributed to its popularity and growth within the blockchain ecosystem. Here are some key advantages of the BSC network:
High Speed and Low Transaction Fees: BSC is known for its fast block confirmations, which result in quick transaction processing times. This speed is achieved through its unique consensus mechanism. Additionally, BSC’s low transaction fees have made it a preferred platform for developers and users.
Compared to other popular blockchain networks, BSC offers significantly lower transaction costs, making it more accessible for individuals and businesses of all sizes. This cost-effective system has aided the exponential growth of decentralized finance (DeFi) applications on the BSC network by providing a wide range of financial services to users around the world.
Scalability: BSC has been designed to handle high transaction volumes, allowing for the smooth and efficient execution of decentralized applications (dApps). This advantage enables BSC to accommodate the growing demands of users and developers without compromising performance.
Compatibility with Ethereum: The compatibility of BSC with the Ethereum Virtual Machine (EVM) has made it easy for developers to port their existing Ethereum-based projects to BSC, expanding the pool of available applications.
This opens up a world of possibilities, as it expands the range of applications available on BSC, offering users a greater selection of innovative and diverse decentralized applications to choose from. This interoperability has fostered innovation and attracted a diverse range of projects, including decentralized exchanges, yield farming platforms, and NFT marketplaces.
The close integration between BSC and the Binance exchange also creates a host of advantages for users. The seamless connection between these two platforms facilitates effortless token swaps and transfers.
Related Reading: Celestia Network: How To Stake TIA And Position For 5-Figure Airdrops
This integration enhances overall liquidity, ensuring that users have quick and convenient access to a diverse range of digital assets. Whether it’s trading, diversifying portfolios, or exploring new investment opportunities, the close relationship between BSC and Binance empowers users with a seamless and detailed experience in the world of digital assets.
Trading On The BSC Network
Decentralized exchanges (DEXs) on the Binance Smart Chain (BSC) network provide traders with a range of features and opportunities to enhance their trading experience. Here’s an elaboration on the features of DEXs on BSC:
Automated Market Makers (AMM): DEXs on BSC leverage AMM protocols to enable token swaps. AMM algorithms automatically set token prices based on supply and demand dynamics within liquidity pools. This feature eliminates the need for traditional order books and enables continuous liquidity, allowing traders to execute swift and efficient trades.
Yield Farming: Yield farming is a popular practice in the decentralized finance (DeFi) space, and many BSC DEXs offer yield farming opportunities where traders provide liquidity to specific token pairs by depositing their assets into smart contract-based liquidity pools. In return, they receive liquidity provider (LP) tokens, which represent their share of the pool.
Traders can then stake these LP tokens in yield farming programs to earn additional tokens or rewards. Yield farming enables traders to earn passive income by utilizing their idle assets effectively.
Liquidity Pools: These are fundamental components of DEXs on BSC which consist of pairs of tokens that are used for trading. Traders can contribute their assets to these pools and become liquidity providers.
By providing liquidity, traders help ensure that there is sufficient liquidity available for trading. In return for their contribution, liquidity providers earn a portion of the trading fees generated by the DEX. This incentivizes traders to provide liquidity, as they can earn fees from the trading activity in the pool.
Token Trading: DEXs on BSC offer traders the ability to trade a wide range of tokens. These tokens can include native tokens of projects built on the BSC network, as well as tokens that have been bridged from other blockchains, including Ethereum.
Traders have access to various trading pairs, allowing them to buy and sell tokens directly from their wallets. The availability of diverse tokens and trading pairs provides traders with abundant opportunities to explore various markets and investment opportunities.
Additionally, the Binance Smart Chain (BSC) is a modified Ethereum fork which simply means that it is compatible with the Ethereum network. Both of these blockchain networks have similar infrastructure, which is why they have the same address in your wallet.
This is to ensure that your funds are not permanently lost when you send them via the wrong network. Simply put, if you send a token to your ETH via the BSC network, the funds will still be on the blockchain and you’ll be able to retrieve them.
How To Get Started On The BSC Network
To buy and sell tokens on the Binance Smart Chain (BSC) network, you will first need to get a Metamask wallet and fund it with BNB tokens. MetaMask is a popular browser extension wallet commonly used for interacting with blockchain networks like Ethereum and Binance Smart Chain (BSC). It is available as a browser extension for popular browsers such as Google Chrome.
Ensure your Metamask Wallet has been added to your browser as an extension by clicking on the “Add to Chrome” icon on the top right as shown below:

Once installed and set up, MetaMask allows users to manage their cryptocurrency wallets, interact with decentralized applications (DApps), and securely execute transactions on supported blockchain networks directly from their browsers. (Make sure to write down your seed phrase on a piece of paper and keep it safe. Do not store it online).
Next, add the BSC network to your Metamask wallet by following the instructions provided on the Metemask website here.
Getting BNB Tokens To Trade On The BSC Network
Once that is done, you need to fund your wallet with BNB before you can begin trading on the BSC network. You can buy BNB on centralized exchanges such as Binance, copy your wallet address from Metamask, and then send the BNB from Binance to your Metamask wallet.
You can also purchase BNB directly within the Metamask wallet using traditional payment methods such as credit or debit cards, PayPal, bank transfer, CashApp, etc.
Just click on the “Buy/Sell” button within Metamask which will open up the interface. Here, you can put how much BNB you want to buy in terms of dollar terms, pick your payment method, and then click “Buy”.
Note that to buy crypto directly within Metamask, you will need to provide info such as your country and state. However, it is a straightforward process that only takes a minute.
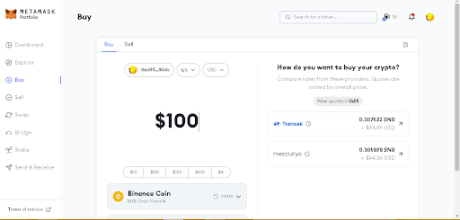
It’ll only take a couple of minutes at most for your BNB to arrive in your wallet. Once the BNB arrives, you are all set to begin trading tokens on the BSC network. So head over to Pancakeswap to get started on your trading journey.
How To Trade Tokens On The BSC Network Using PancakeSwap
PancakeSwap is the leading decentralized exchange on the BSC network. Here, users are able to buy and sell a large range of tokens, and it is a straightforward process.
Make sure you are on the correct Pancakeswap website to prevent your wallet from being drained. The next step is clicking on the “Connect Wallet” option on Pancakeswap at the top right corner as illustrated below:
Connect to your preferred wallet as shown below. (In this case, it’s Metamask):
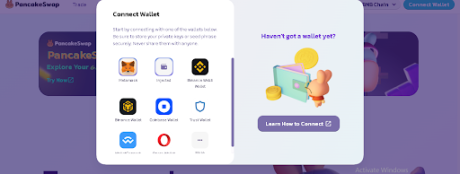
Once connected, switch Metamask to the BSC network. (If you’re already on the BSC network, you do not need to switch):
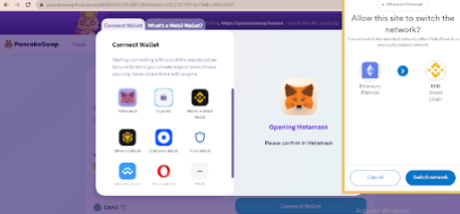
With MetaMask connected to the BSC network, go to PancakeSwap, then you can start trading on the BSC network using PancakeSwap. Search for the token you want to purchase using the name or the contract address.
Set slippage to auto to avoid having to manually set it with each swap. Once done, pick how much BNB (at the top) you want to convert to the new token (at the bottom), click on “Swap,” and confirm the transaction in your Metamask wallet.
Once the transaction is confirmed, the tokens will be sent to your wallet. To convert your tokens back into BNB, repeat this process by putting the new token at the top and picking BNB at the bottom. Click Swap and BNB will be sent to your wallet.
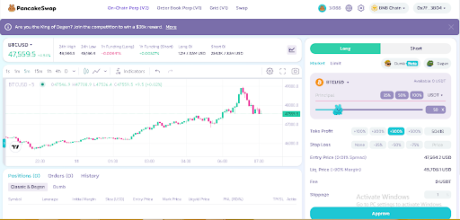
Buying And Selling Tokens With The Metamask Wallet
BSC Network users can also buy and sell tokens using the Metamask extension wallet already connected to the BSC network.
To do this, make sure you’re connected to the BSC network and have BNB to swap and pay for gas fees. Then navigate to the “Swap” button as shown below. This will take you to the Swap interface inside Metamask.
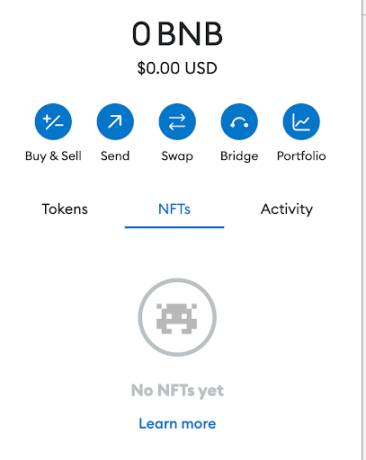
Here, you can also search for tokens using the name or the contract address, just like on Pancakeswap. Input the amount of BNB you want to swap, confirm that you have the correct token, and then click “Swap.” Once the transaction is confirmed, the tokens you just bought will be sent to your wallet.
Tracking Token Prices On The BSC Network
BSC network users can leverage on-chain tools such as Dextools to access detailed market insights about a particular token such as price and contract information to enable them to make informed trading decisions.
Dextools offers a range of features that are particularly beneficial for users on the BSC network. One notable feature is the ability to check charts, providing real-time and historical price data for various tokens. These charts enable users to analyze price trends, trading volumes, and other relevant metrics, helping them identify potential entry or exit points for their trades, as shown below:
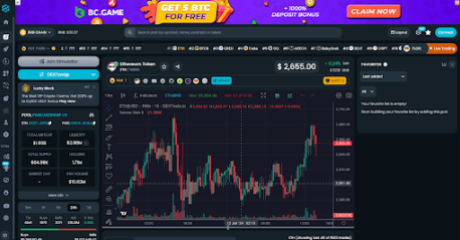
In addition to charting capabilities, Dextools provides a “Contract Audit” feature that is especially valuable for BSC users. This feature allows users to check the audit score of a smart contract before investing in a token. Audits assess the security and reliability of a contract’s code, highlighting potential vulnerabilities or risks.
By accessing the audit score through Dextools, users can evaluate the level of trustworthiness and credibility of a token’s underlying smart contract, minimizing the chances of falling victim to scams or vulnerabilities.
Conclusion
The BSC network has become popular within the blockchain ecosystem due to its advantages and has attracted a diverse range of projects and users. BSC’s compatibility with Ethereum facilitates seamless token transfers between the two networks, enhances diversification of development and usage, and promotes collaboration within the broader blockchain ecosystem.
Additionally, it offers interoperability, allowing developers to easily port existing Ethereum-based applications and assets to BSC. This compatibility grants access to the extensive Ethereum ecosystem, enabling users to leverage the infrastructure and liquidity of Ethereum while benefiting from BSC’s faster transactions and lower fees.
BSC’s combination of interoperability, accessibility to liquidity, and enhanced transaction efficiency makes the BSC network a compelling choice for both developers and users, solidifying its position as a prominent player in the evolving blockchain landscape.
How To Buy And Trade Tokens On The SEI Network
In the dynamic trading world where time is of the essence and you are looking for a combo of speed and low fees, the SEI Network is the fastest decentralized Cosmos-based L1 blockchain that is trading-based with the availability of decentralized exchanges (DExs).
The SEI Network has been optimized to handle large volumes of transactions quickly and efficiently while keeping costs low. This makes it an attractive option for businesses and individuals looking to exchange value in a fast, efficient, and cost-effective manner.
The network has an in-built order book that allows smart contracts to easily access shared liquidity. This shared liquidity feature makes it possible for smart contracts to interact with each other and exchange value without third-party interference.
The way SEI is structured makes it possible for decentralized exchanges and trading applications in areas such as DeFi, NFTs, and gaming to provide the best possible user experience.
In this easy-to-follow guide, we will explore the main features of the super-fast SEI Network, how to set up a trading account, and the different ways to obtain and trade the SEI token. By the end of this guide, you will have a good understanding of how the SEI Network works, its advantages, and how to get started.
Features of SEI Network
Speed:
The most unique feature of the SEI network is its speed. It is currently the fastest chain to finality, boasting an impressive lower bound of 300 milliseconds. With unparalleled speed and efficiency, SEI allows for transactions to be immutably recorded on the blockchain in record time using an on-chain order book.
It is superior in terms of finality and is indisputable. When using SEI, users experience the near-instantaneous confirmation of their transactions, providing a seamless and efficient blockchain experience.
The network’s ability to achieve finality rapidly sets it apart from other blockchain platforms, making it an attractive choice for those seeking very fast and secure transaction processing.
Frontrunning protection:
The SEI network provides robust frontrunning protection, effectively combating the malicious practices that plague most of the other ecosystems. With advanced algorithms and stringent safeguards, SEI ensures secure and fair transaction processing, free from manipulation and unfair advantages.
By prioritizing integrity and trust, SEI sets a high standard for ethical conduct and fosters a level playing field for all participants to engage and experience a secure and reliable platform where transactions are protected, and investments are safeguarded.
Twin Turbo Consensus:
One standout feature of the SEI network is the twin-turbo consensus. This innovative consensus mechanism harnesses the power of two turbocharged engines working in sync to allow SEI to achieve exceptional speed and throughput, surpassing industry standards.
SEI’s twin-turbo consensus is designed to handle a lot of transactions at once without slowing down or compromising reliability. It has the ability to adjust and allocate resources as needed when transaction volumes increase.
This means that the SEI network can keep up with growing demands and perform at its best without compromising speed or dependability. So no matter how many transactions are happening, SEI is able to ensure smooth and efficient processing all the way.
Native Matching Engine:
SEI’s native matching engine is a valuable asset for exchange teams, offering rapid order matching and execution capabilities. It empowers exchanges to handle high volumes of transactions efficiently, catering to active traders on the network.
The engine’s flexibility allows customization to meet specific trading requirements, ensuring a tailored and user-friendly experience. With strict enforcement of matching rules, it upholds transparency and fairness in the trading process. Exchange teams leveraging SEI’s native matching engine can optimize their operations, enhance user experiences, and build a trustworthy trading ecosystem.
SEI Network: The Layer 1 For Trading
Trading is undeniably the most widely adopted use case for cryptocurrencies. However, it is a common misconception among crypto enthusiasts that trading is solely limited to decentralized finance (DeFi) applications. In reality, the need to exchange digital assets is fundamental to every aspect of the crypto ecosystem, ranging from social applications to non-fungible tokens (NFTs) and gaming.
Recognizing the significance of trading across the crypto space, SEI Networks has developed a Layer 1 blockchain specifically tailored to meet the diverse trading needs of users. SEI’s primary objective is to provide a robust, scalable, and seamless trading experience. By optimizing every layer of the technology stack, SEI ensures that users can efficiently exchange digital assets across various sectors while maintaining reliability and scalability.
SEI Networks addresses the scalability challenges associated with trading by building the first Layer 1 blockchain specialized for trading. This approach enables SEI to offer the most efficient infrastructure for the exchange of digital assets.
By focusing on the unique requirements of trading, SEI Networks aims to enhance the overall trading experience for users and facilitate the seamless flow of digital assets across different applications and use cases.
With its emphasis on scalability, reliability, and user experience, SEI Networks is well-positioned to serve as a foundational blockchain platform for the trading of digital assets. Whether it’s DeFi protocols, NFT marketplaces, gaming platforms, or other crypto-based applications, SEI Networks provides a solid infrastructure to support the exchange of assets and foster the growth of the broader crypto ecosystem.
SEI Token
The rise in popularity of EVM-compliant blockchains and the parallelization process is driving the growth of the sei Network’s SEI token. SEI token serves as the native cryptocurrency within the SEI ecosystem, SEI token fulfills a variety of roles, which include:
- Transaction Fees: SEI token is utilized to cover transaction fees incurred on the Sei Network. These fees serve as incentives for validators and contribute to the network’s security.
- Staking: SEI tokens can be staked by users to accrue rewards and bolster the overall security of the SEI Network.
- Governance: SEI tokenholders possess the ability to actively participate in the governance of the SEI Network. This participation encompasses voting on proposals and the election of validators.
SEI token presents itself as a promising cryptocurrency with a diverse range of potential applications, positioning itself at the forefront of blockchain innovation tailored for trading purposes.
How To Configure Your Wallet To Begin Trading On The SEI Network
To trade tokens on the SEI Network, you would first need to connect your wallet to the SEI Network. Keplr is a popular browser extension wallet that can be used to interact with the SEI Network.
Ensure your Keplr wallet extension has been added to your browser as shown below:
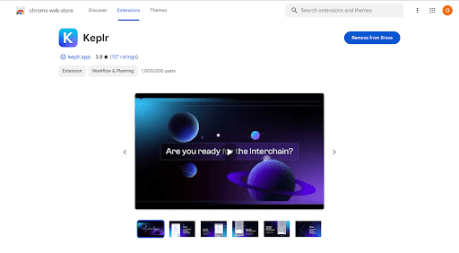
Once connected to your Keplr wallet, go to Keplr using the extension on your Chrome browser, click on the hamburger sign in the top left corner, and select “Manage Chain Visibility”:
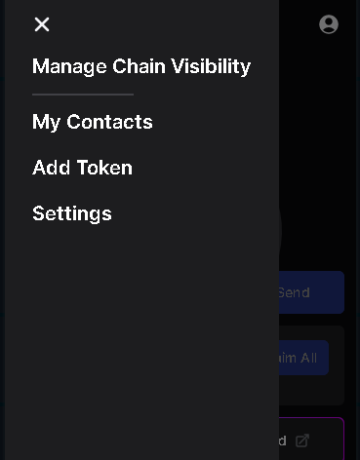
Click on the search bar, next type in SEI, Enable it, and Save it:
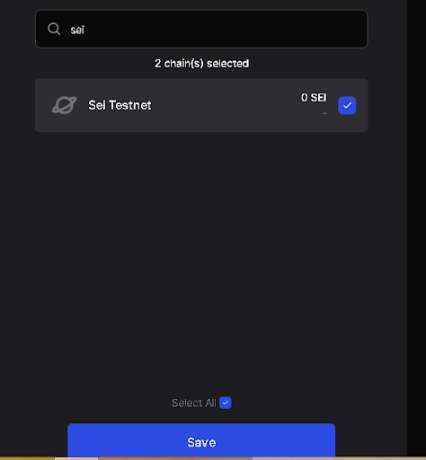
How To Buy And Trade SEI On Centralized Exchange Platforms
To embark on the journey of acquiring SEI, one can explore various prominent exchanges where SEI is listed. Platforms such as Binance, Kucoin, and COINEx offer a convenient gateway for purchasing SEI.
- Create or log in to an account with any of the exchanges listed above.
- Deposit Funds: After logging in, using the image below click on “deposit” to deposit funds into your account using any supported cryptocurrencies or deposit methods available on the exchange. Having funds in your account enables you to execute trades seamlessly.
- Navigate to SEI Trading Page: Once your account is funded, go to the dedicated SEI trading page or type “sei” in the search bar for easy navigation. Here, you can find various trading pairs with SEI tokens.
- Choose a Trading Pair: Select the desired trading pair that matches SEI with another cryptocurrency. For instance, you may choose SEI/USDT if you wish to trade SEI against USDT (Tether).
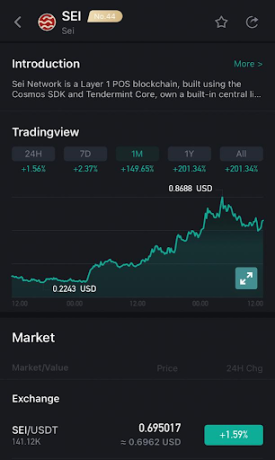
- Specify the Purchase Amount: Determine the quantity of SEI tokens you want to purchase. Input the amount in the trading interface, which will calculate the corresponding cost based on the current market price.
- Execute the Trade: With the specified amount, proceed to execute the trade. Confirm the details, and if you are satisfied, submit the order. By following these comprehensive steps, you can easily trade SEI on CoinEx, taking advantage of the available trading pairs.
Related Reading: Celestia Network: How To Stake TIA And Position For 5-Figure Airdrops
Once you’re done, go to your Keplr wallet, click on Deposit, and copy your SEI wallet. Then go over to your centralized exchange account, click on Withdraw, and then send your SEI tokens to your Keplr wallet address you copied earlier. (Always double-check to make sure you have the correct wallet address).
The SEI network is quite fast so the tokens should arrive in your Keplr wallet in a matter of minutes. As soon as the SEI tokens arrive in your wallet, you’re ready to start trading tokens on the network.
How To Trade Tokens On SEI Network Using Keplr Wallet
To start trading on the SEI network, navigate to the Astroport decentralized exchange (DEX). Visit the site’s homepage and click on “Start Trading” as indicated in the top right corner in the image below:
The next step is selecting the SEI Network and clicking on the “Connect Wallet” option on Astroport at the top right corner as illustrated below:
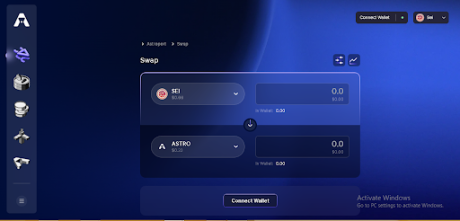
Connect to your preferred wallet, in this case, it’s Keplr wallet:
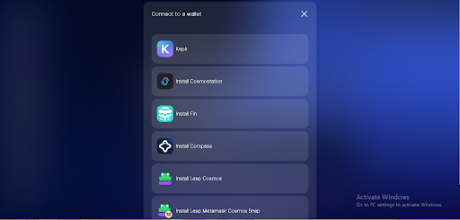
Once connected and the SEI network is enabled you can now trade on the SEI network by navigating to the DEX (decentralized exchange) in this case using Astroport and selecting the token pair you wish to trade.
You can search for the token you want to trade using the name or the contract address obtained from the project’s website or official social media handles. Select the amount of SEI tokens you want to convert to the new token and click “Swap.”
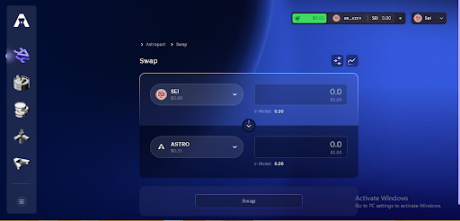
Once the transaction has been confirmed, your tokens will be transferred to your connected (Keplr) wallet. Rinse and repeat to buy and sell tokens on the SEI network.
Tracking SEI Token Charts
Users can also utilize Coinhall to check charts, providing valuable market insights. Coinhall offers two distinct advantages: comprehensive charting tools that provide in-depth market analysis, and real-time access to valuable insights for making informed trading decisions.

Conclusion
SEI network offers a fast, efficient, and cost-effective platform for buying and trading tokens. With its optimized infrastructure, SEI can handle large transaction volumes quickly and at low fees. It is the first sector-specific Layer 1 blockchain, specialized for trading to give exchanges an unfair advantage.
The SEI token has been able to maintain strong investor support on their platforms including a seven-day rally leading to over 43% surge. The network’s features, such as its speed, frontrunning protection, twin-turbo consensus mechanism, and native matching engine, make it an attractive choice for trading enthusiasts.
SEI’s native cryptocurrency, SEI token, serves various purposes within the ecosystem, including covering transaction fees, staking for rewards, and participating in governance.
DeFi Identity Should Be Focus of U.S. Policymakers, CFTC Says
The Commodity Futures Trading Commission wants U.S. policymakers to evaluate options for regulating the issue of identity information in decentralized finance, a report published Monday said.
How To Bridge And Trade On The Injective (INJ) Network
Injective is a blockchain designed specifically for finance. It is an interoperable and environmentally-friendly layer 1 blockchain that supports advanced DeFi applications, including crypto trading dApps, like spot and derivative exchanges, and lending protocols.
That being said, in the fast-paced world of cryptocurrency, the Injective Network has emerged as a trailblazing force, revolutionizing the landscape with its innovative approach to scalability and seamless trading experiences. In my opinion, I will say that Injective is trying to follow the Solana path in terms of progressive growth in the ecosystem and price value.
In this in-depth guide, we’ll navigate through the essential features of the Injective (INJ) Network, unravel the intricacies of initiating your trading journey, and explore various methods to acquire and trade the coveted Injective Coin (INJ).
Solving Scalability: The Essence of Injective (INJ) Network
The scalability challenge has long been a hurdle for widespread crypto adoption, and Injective Network steps up to the task as a groundbreaking solution. Scalability is the reason some people don’t trade certain coins. For instance, I avoid making certain Ethereum transactions because of the high gas fees. If I want to make any monetary transaction, I prefer to use a more scalable coin like injective (INJ).
Scalability isn’t just about transaction costs but also about the speed of transactions. Injective Network boasts a remarkable transaction speed of 0.8 seconds, leaving competitors, including Ethereum and its layer 2 counterparts, in the rearview mirror. What more can you ask for with their gas fees as low as $0.01, Injective Network brings unparalleled efficiency to the world of blockchain transactions.
Injective (INJ) gives you a better DeFi experience, this is because you are not scared of exploring the DeFi space due to high gas fees and slow annoying transaction speed. If you have transacted on the Ethereum chain or done any past DeFi activity on the Ethereum chain, you will be conscious of your exploration because each activity will incur a transaction fee whether the contract signed is successful or not and it’s not cheap.
Initiating Your Injective Trading Journey
Embarking on your trading journey within the Injective Network involves meticulous steps to ensure a seamless experience. The choice of a compatible wallet is paramount, and here, we delve deeper into two main types:
- EVM Based Wallets:
EVM compatibility is the bedrock for smooth integration with Injective Network. While Metamask is a popular choice, it’s essential to understand its intricacies, especially when it comes to the EVM chain. Exploring alternative EVM-based wallets can provide tailored solutions for optimal user experience.
It is preferable to use an EVM wallet like Metamask if you are bridging from an EVM chain to an injective chain. As we go further into this post, you will learn how to bridge from EVM to the injective chain. EVM wallet like metamask makes your Defi experience on the injective easier but you can’t compare it to that of the cosmos-based wallet.
- Cosmos Based Wallet:
For a user-friendly experience on your PC, consider Cosmos-based wallets like Leap and Keplr. These Chrome extensions are tailor-made for Injective Networks, ensuring not just compatibility but also enhanced security features. Using a Cosmos-based wallet makes interaction far easier than EVM-based wallets. But you can’t have EVM-based assets on this wallet, this means that you can’t bridge EVM assets to injective using this wallet, you need to use Metamask.
These wallets, the EVM-based wallets, and the Cosmos-based Based Wallets are great for your smooth Defi experience when interacting on the injective chain.
Acquiring Injective Coin (INJ)
Once your wallet is set up, the next crucial step is acquiring the prized Injective Coin. INJ is prominently listed on various centralized exchanges, including Binance, Coinbase, Kucoin, Bybit, OKX, and Gate.io. Each exchange offers its unique advantages, and strategic users may explore multiple platforms for optimal trading conditions.
Consider securing your INJ in a Keplr wallet for efficient portfolio management. When you are sending INJ from centralized crypto exchanges to your Keplr wallet, make sure you choose the Injective network and paste your Injective network address from your Keplr wallet.
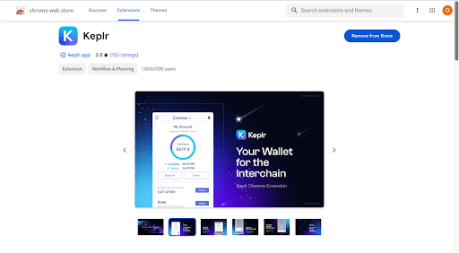
Setting Up Keplr Wallet for Injective Chain Visibility
Creating a Keplr wallet is a straightforward process through the Chrome extension. Get your Keplr wallet, and create a new wallet, you will be given a seed phrase, save the seed phrase, usually a 12 or 24-word seed phrase. Do not forget to save them, in order not to lose your account permanently.
To make the Injective chain visible in your Keplr wallet, follow these steps:
- Click on the hamburger sign in the top left corner.
- Navigate to “Manage Chain Visibility.”
This will take you to where you can view the chain visibility on the Keplr wallet, this is essential as it helps you select other chains on the Keplr wallet.
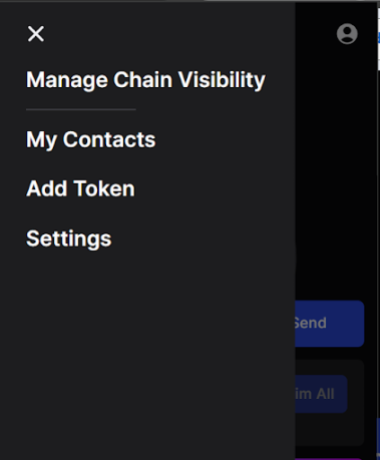
- Search for “Injective” or “Inj” and click on “Add Token.”

By enhancing Injective-related keywords in your wallet setup process, you not only optimize for search engines but also ensure clarity for users seeking to manage their INJ effectively.
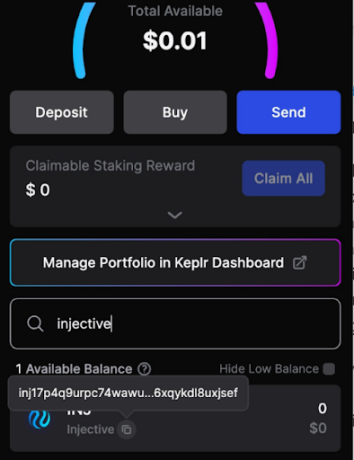
It is important to know that every address on the injective chain starts with the “inj” prefix, this helps you identify the injective chain easily. Congratulations you are about to begin your Injective DeFi journey.
Defi means Decentralised Finance, this is a type of transaction that doesn’t require a centralized platform like Binance, Bybit, OKX, or whatever centralized exchange you know. All you need to perform a DeFi transaction is a DEX (Decentralised Exchange) wallets like Keplr and a Dapp (Decentralised Application).
We have a wallet now, we need to fund it with INJ before interacting with a Dapp on the Injective wallet. You can get INJ tokens from an exchange like Binance Binance. You can deposit on your Binance in whatever way you are used to depositing on your Binance, you can deposit USDT with fiat. Trade the USDT for INJ. The next step is to withdraw the INJ to your Keplr wallet. Withdraw the INJ on the Injective wallet.
Withdrawing INJ coin and Bridging Tokens:
The withdrawal process after acquiring INJ involves selecting the coin, choosing the Injective chain, and pasting your Keplr Injective address. Remember the address has to start with “INJ”. This step is crucial for securing your assets, and benefits from additional details regarding security measures, transaction confirmation times, and potential challenges users might encounter. This is just one method to get INJ from a centralized exchange, you can also get INJ by bridging.
Bridging, an alternative method for bringing tokens to Injective, is an essential strategy, especially for users keen on optimizing their portfolio across multiple chains. Bridging from an EVM-based wallet requires a metamask and INJ on an EVM chain. For instance, if you have INJ on the ETH chain in your metamask, all you need to do is connect your metamask to the Injective Bridge platform. This will help you bridge from the ETH chain to the injective chain.
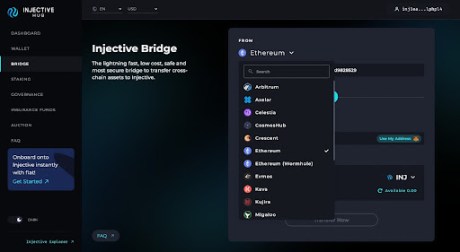
Bridging Tokens in the Cosmos-Based Wallet Ecosystem:
An intriguing method to diversify your portfolio involves bridging tokens from the Cosmos-based wallet ecosystem to Injective. For example, bridging TIA (Celestia) to Injective and swapping TIA (Injective) to INJ (Injective) using Astroport opens up opportunities within the Cosmos ecosystem.
You will have to go to the Injective Bridge platform, connect to your cosmos-based wallet, select whatever cosmos-based wallet token you have like TIA (Celestia), and bridge from the Celestia chain to the injective chain. Emphasizing this integration showcases the versatility of Injective Network and its compatibility with other blockchain ecosystems. Now you have TIA(Injective) you need to swap it to INJ, trading or swapping can be done Astroport.

Trading INJ on Astroport
Astroport, the decentralized exchange (DEX) on the Injective chain, serves as the epicenter for token swaps. After successfully bridging tokens, users can initiate trades on Astroport, leveraging the platform’s decentralized nature for portfolio diversification. Whatever you are swapping here is expected to be on the injective chain, you can swap INJ for all the available tokens, and now you can trade as easily as you like.
How To Trade on Coinhall
Coinhall is a site where you can bridge directly and swap. It is a multi-token bridge swap DEX that you can use to bridge and swap at the same time but only for Cosmos-based tokens and coins. It serves as a smart chart for all cosmos-based tokens including injective and also for swapping and bridging.
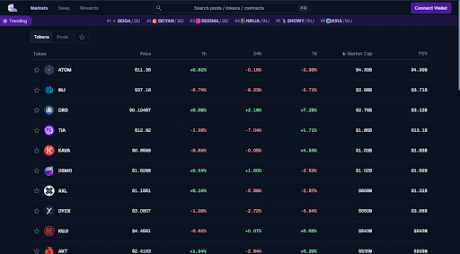
You can see all the available coins and tokens with their respective prices here, it’s a good DEX dApp to use. You can scroll here and search for the token you are looking for. You can also search by using the search bar.
If you want to trade a token and you can find it on the list, all you have to do is go to Coinhall and type the name of the token, as well as search using a contract address.
Coingecko is also a good site that has the details of coins. Here, you can search for the name of the coin or token you are looking for, and get the contract address directly.
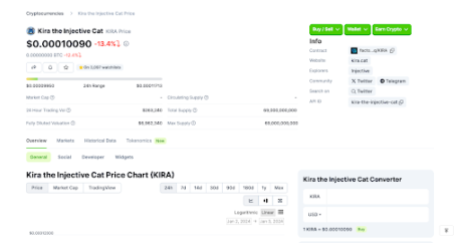
Go to the info section and search for the contract, copy the smart contract from Coingecko, and paste it into the coinhall market search button.
Like this:
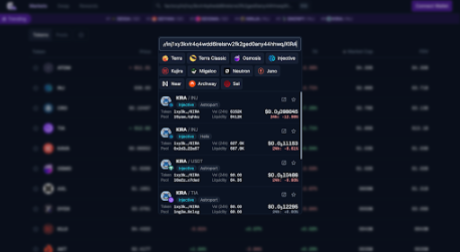
This will take you to where you will be able to trade any token based on the dex.
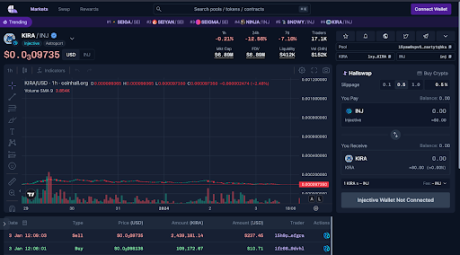
Let’s explore Coinhall as A Bridge Swap DEX
To explore Coinhall this way, you need to navigate to the Swap section. This section will give you the opportunity to bridge and swap at the same time. For instance, if you want to swap TIA (Celestia) to INJ (Injective) you can do this at ease with one click.
Instead of bridging TIA (Celestia) to TIA (Injective) then swapping it to INJ. You can do it as shown below:
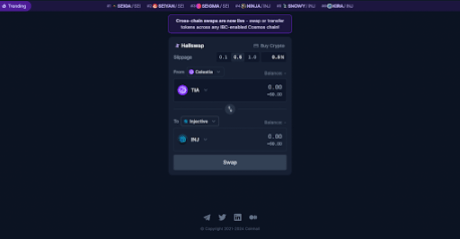
Conclusion
With your INJ Coin securely stored in your wallet, you’re now poised to explore the exciting world of trading on the Injective Network. The scalability, low transaction fees, and swift processing times position the blockchain as a promising platform for crypto enthusiasts and traders alike. In the dynamic realm of decentralized finance (DeFi), Injective Network stands tall, offering innovative solutions for seamless and efficient trading experiences.
As you navigate this multifaceted landscape, remember that the Injective Network isn’t just a platform; it’s a gateway to transformative technology shaping the future of cryptocurrency. These steps, when taken with a strategic mindset, offer not only trading opportunities but also a deeper understanding of the evolving crypto ecosystem.
Stay informed, trade wisely, and harness the full potential of the Injective Network, where every transaction is an opportunity to redefine your crypto journey.
In summary, this comprehensive guide provides an extensive roadmap for mastering the Injective Network, ensuring that users, from beginners to seasoned traders, can navigate the intricacies of this innovative blockchain ecosystem with confidence and clarity.
DeFi Market Rebounds to $50B as Speculators Hunt for Yield
The total amount of capital locked or staked across all decentralized finance (DeFi) protocols reached $50 billion on Tuesday, the most in six months.
Blast Surpasses Cardano And Base – Here’s How Much DeFi Investors Have Locked
Blast is the latest Layer 2 network to burst into the scene in the last week and has taken the decentralized finance (DeFi) world by storm already. This network which seemingly came out of nowhere has backing from Paradigm, and as its popularity has risen, it has surpassed Base and Cardano’s Total Value Locked (TVL) in less than a week after launch.
Blast TVL Crosses $565 Million
The Blast network was officially announced on November 21 and it quickly garnered support from crypto investors. In the first day, the network saw over $81 million in crypto locked. And in two days, the figure had quickly grown above $123 million.
Despite some of the FUD (Fear, Uncertainty, and Doubt) that has followed the launch of the network, investors have continued to bridge their assorted into it. By Sunday, November 26, the total value locked on the Blast network had officially crossed $544 million, according to data from DeFi tracker DeFiLlama.
This figure puts the network’s TVL ahead of older competitors such as Coinbase’s Base. While Blast’s TVL sits at $544 million, the Base TVL is at $338.26 million. This means that Blast’s TVL is currently 60% higher than that of Base.
In the same vein, the Blast TVL is also way ahead of that of Cardano. Presently, the Cardano TVL sits at around $330.07 million, just a little lower than Base, and around 61% lower than that of Blast.
New L2 Draws Criticism From DeFi Investors
Amid the rapid growth that Blast has enjoyed, it has also drawn criticism from DeFi investors. The concerns have ranged from security to how the network is being run. One of the most pertinent criticisms has stemmed from the fact that all of the crypto being bridged to the network will be locked until next year.
The network revealed that investors will not be able to access their locked funds until February 2024. In addition, Blast promises users yield on their Ethereum (ETH) and stablecoins being bridged to the network, but with no readily discernible way of how this yield will be earned.
Some members of the crypto community have, however, figured out that the funds were being deposited into the Lido DAO protocol. Apparently, Blast is currently earning around $1.5 million a month by depositing the bridged funds into Lido. This has further raised concerns about the growing dominance of Lido, which is headed toward 33.3% and could pose a risk for the Ethereum network.
Nevertheless, Blast continues to dominate conversations around DeFi on social media. There is now a total of 266,130 ETH locked on the network, with the expectations of an airdrop happening in 2024.
KyberSwap Offers 10% Bounty to Attacker Who Made Off With $50M
The attacker had said negotiations would start when they are “fully rested,” and hasn’t been heard from since.


