The Binance-owned wallet has been the victim of multiple cyber attacks during 2023.
What Are The Top 5 XRP Wallets To Use?
[toc]
In the realm of digital riches, XRP wallets stand tall as a secure haven and a gateway to empowerment. These wallets not only offer a safe space for storing, sending, and receiving XRP, but they also grant you the keys to the kingdom. With robust security measures like password protection, encryption, and multi-factor authentication, your holdings are shielded from the clutches of cyber villains. No longer do you need to rely on third-party custodians, as these wallets put you in full control of your investments.
XRP wallets come in various types, each catering to different needs and preferences. Software wallets like XAMAN and TRUST wallet can be installed on your computer or mobile device, providing a convenient way to manage your XRP. Hardware wallets such as Ledger Nano X offer enhanced security by storing your tokens offline. On the other hand, online wallets like Uphold and GateHub allow you to access your XRP through a web browser.
However, convenience doesn’t take a backseat with XRP wallets. Integrated address books and QR code support make sending and receiving XRP a breeze, eliminating the need for laborious manual entry. Transactions can be completed with a simple swipe, ensuring seamless and effortless interactions with your XRP holdings.
In this article, whether you’re an experienced crypto connoisseur or a curious explorer, we will highlight the top 5 XRP wallets that provide a compelling mix of security, control, and convenience, making them an essential tool in your digital asset arsenal.
Essential Factors To Keep In Mind When Picking XRP Wallets
Compatibility
When selecting an XRP wallet, it’s crucial to consider its compatibility with your devices and preferred operating systems. Ensure that the wallet you choose seamlessly integrates with your desktop, mobile, or web-based platforms. By opting for a wallet that aligns with your preferred platforms, you can enjoy a smooth user experience and easily manage your XRP holdings from the devices you use most frequently.
Security
Ensure that the wallet you choose offers robust security measures, such as encryption, password protection, and two-factor authentication. These features help safeguard your holdings from unauthorized access and potential cyber threats.
Private Key Control
It is absolutely imperative to carefully choose wallets that provide you with unwavering and unconditional control over your private keys. Such wallets empower you to retain absolute ownership and sovereignty over your XRP holdings, significantly decreasing your dependency on third-party custodians.
Backup and Recovery
It is essential to verify that the wallet offers reliable backup and storage options for your private keys or recovery phrases. This step is critical to prepare for potential device loss, damage, or unforeseen events. By having a secure and easily accessible backup, you can always recover your funds with peace of mind.
Reputation and Community Support
Conduct thorough research on the wallet’s standing and take into account feedback from the XRP community. Prioritize wallets with a proven track record, favorable reviews, and vibrant development and support communities.
Top 5 XRP Wallets To Use
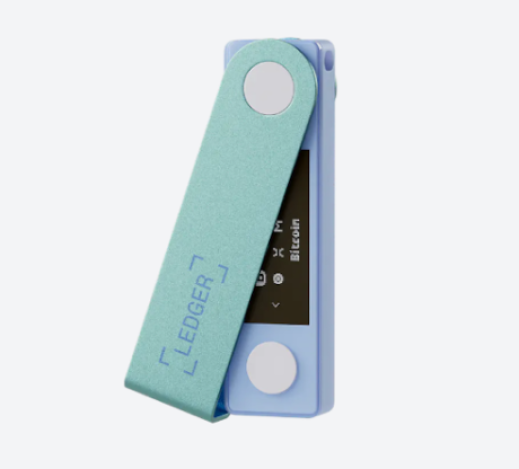
Ledger Nano For XRP (Hardware Wallet)
The Ledger Nano X is an advanced hardware wallet that offers robust security and offline storage for XRP and other cryptocurrencies. With its user-friendly interface, companion app, and multi-currency support, it provides a convenient and secure solution for managing your XRP funds. The Nano X is designed to be portable and durable, and offers enhanced connectivity options. It is important to obtain the Nano X from authorized sources and prioritize following recommended security practices to safeguard your assets effectively.
Setting Up Nano Ledger:
You connect the Nano X to your computer or use Bluetooth with the Ledger Live app on your smartphone or desktop.
During setup, you’ll create a PIN and a 24-word recovery phrase. This phrase is crucial for backing up and recovering your wallet if needed, so write it down and store it securely offline.
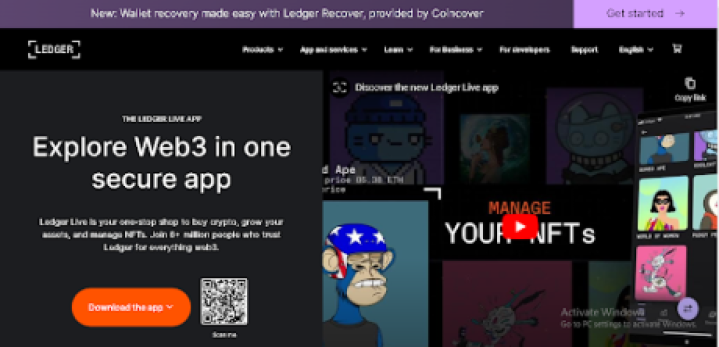
You can then initialize the device and install the app for XRP (or other currencies you want to store). See the image of the Ledger Live App below:
XAMAN Wallet – Formerly XUMM Wallet
XAMAN is a mobile app and wallet created exclusively for the XRP Ledger. It provides a user-friendly interface and a wide range of capabilities for token management and XRP Ledger interaction. With XAMAN, you can securely store, send, and receive XRP, as well as sign transactions, and manage your account.
The app also supports decentralized finance (DeFi) integration and enables the development of personalized XRP-based applications. Security is a top priority for XAMAN, ensuring users have complete control over their private keys. You can download XUMM on iOS and Android devices.
How To Set Up XAMAN XRP Wallets:
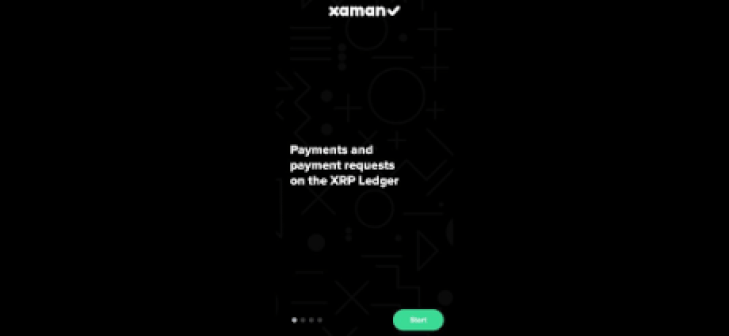
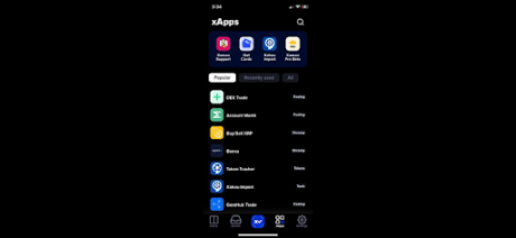
To set up the XAMAN wallet, first, download the XAMAN app from the Google Play Store or App Store. Once installed, open the app and select “Create new account” on the welcome screen to begin the setup process. See images from the App Store below:
The app will prompt you to select a secure PIN code to protect your wallet. Make sure the PIN code is unique and not easily guessable.
Next, backup your account by saving a 24-number recovery phrase. It’s important to write down the numbers in the exact order and store them in a safe place. This recovery phrase will be crucial for restoring your wallet if you lose your device or need to recover your funds. Verify the recovery phrase by entering specific numbers from it to ensure accuracy.
Once your XAMAN wallet setup is complete, deposit funds to activate your account, and you can start using it to send, receive, and manage supported assets like XRP.
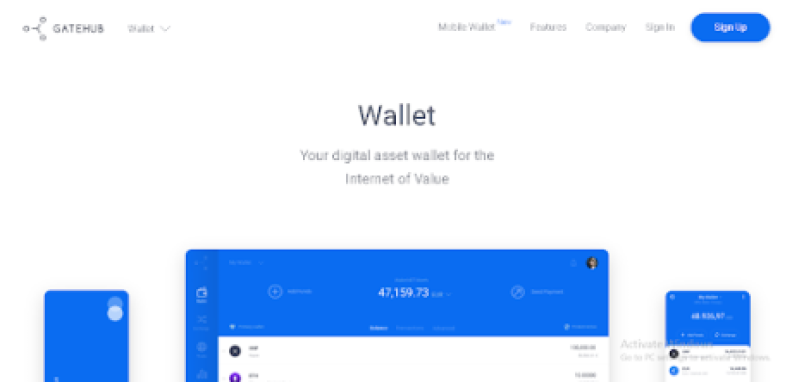
GateHub Wallet
GateHub is a platform that utilizes the capabilities of the XRP Ledger protocol, providing users with a diverse set of features pertaining to the Internet of Value. With GateHub, users can securely send and receive a variety of assets, such as XRP and other supported cryptocurrencies. Additionally, the platform allows for the tokenization and management of different types of assets.
An essential aspect of GateHub is its seamless integration with the XRP Ledger, which is a decentralized blockchain technology explicitly designed for efficient and rapid asset transfers. Through this integration, GateHub empowers users to execute transactions with minimal fees and nearly instantaneous settlement times.
How To Set Up GateHub:
To set up a GateHub account, begin by accessing the GateHub website. Initiate the registration process by selecting the “Sign Up” button.
Provide the required information, including your email address, username, and password. Ensure that your password is robust and secure.
Validate your email address by clicking on the verification link sent to your registered email. This step is crucial to confirm your account. Upon successful email verification, log in to your GateHub account using the credentials provided during the registration process.
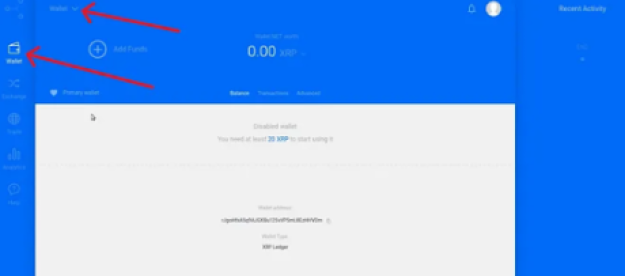
After setting up 2FA, you can create a GateHub wallet by accessing the “Wallet” or “Add Wallet” option in your account dashboard. Choose the desired wallet type, like XRP or other supported cryptocurrencies, and follow the provided instructions to create the wallet.
(See illustrations below)
Click on the wallet drop-down menu in the upper-left corner of your screen:
Then, click on the “Create Wallet” option.
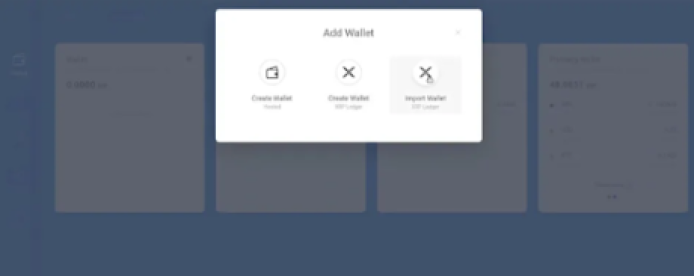
Once your wallet is created, you will be provided with a wallet address. This address can be used to receive XRP into your wallet.
Trust Wallet
Trust Wallet is a well-known mobile wallet that offers support for various cryptocurrencies, including XRP. It provides users with a secure platform to store, transfer, receive, and manage their XRP tokens.
The Trust Wallet interface is designed to be user-friendly, allowing you to easily monitor your balance, track transaction history, and access other pertinent information. When sending XRP to others, simply input their XRP wallet address and indicate the desired amount for a smooth transaction experience.
How To Set Up Trust Wallet
First, download and install the Trust Wallet app from the official app store (available for both iOS and Android).
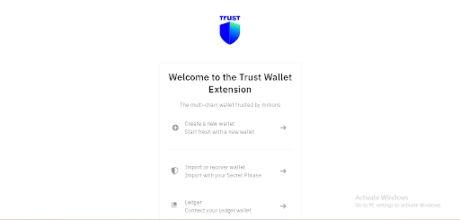
To begin, launch the Trust Wallet app and initiate the process of creating a new wallet by choosing the option “Create a new wallet”. Alternatively, if you possess an existing wallet, you can opt to import it.
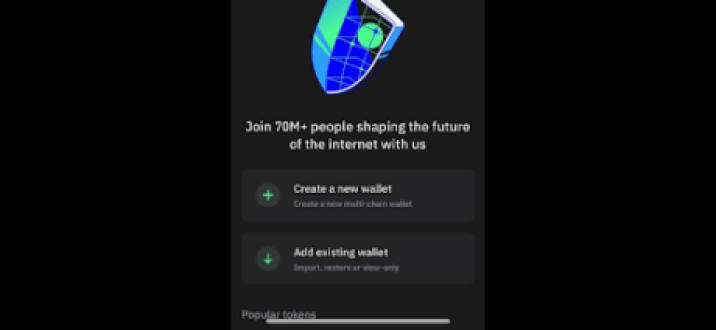
It is of utmost importance to take adequate measures to protect your wallet. Safely backup your wallet’s recovery phrase, as it serves as a crucial means to restore your wallet in the event of loss or device replacement. Take the time to write down the recovery phrase and store it securely in a location that guarantees its preservation.
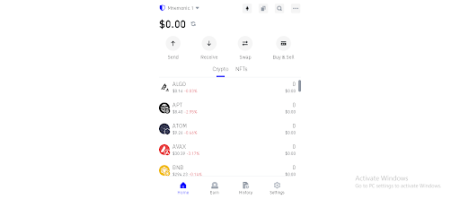
Once your wallet is created, you will be taken to the main interface. Use the “Search” option to add XRP by enabling it, as seen in the image below:
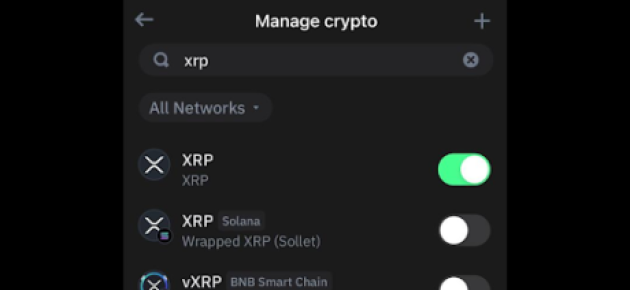
This will make XRP appear in your wallet, displaying its balance. Now, all you have to do is fund your wallet with as minimum as 10 XRP to activate your account, and your tokens will be ready to use.
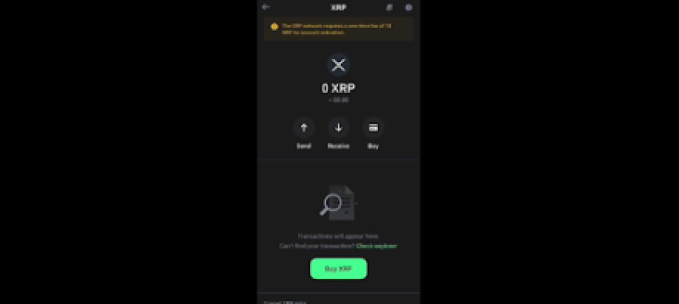
To receive XRP, simply share your XRP wallet address with the sender. They can use this address to send XRP tokens to your Trust Wallet.
Uphold Wallet
The Uphold Wallet is an extensive digital wallet and exchange platform that caters to multiple cryptocurrencies, including XRP. It delivers a smooth and user-friendly experience, ensuring a secure and convenient solution for managing your XRP funds.
Uphold enables effortless storage, sending, and receiving of XRP, along with seamless currency conversion options. With its swift transactions and intuitive interface, Uphold Wallet stands out as a favored choice among individuals seeking a flexible and trustworthy wallet.
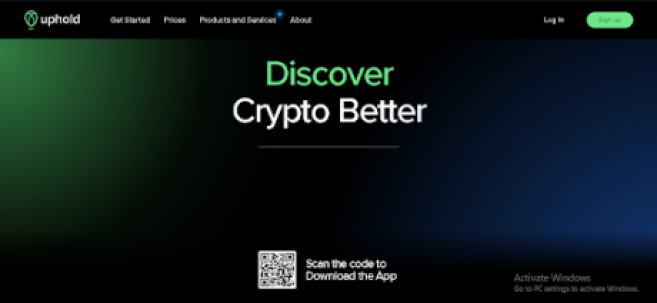
How To Set Up Your Uphold XRP Wallet:
To set up an Uphold Wallet, visit their website and sign up for an account. Verify your email, complete the registration process, and enable two-factor authentication for added security.
Deposit funds into your account and set up your wallet. Once done, you can start using your Uphold Wallet to store, send, receive, and convert XRP within the platform.
Uphold offers a seamless and user-friendly experience, enabling you to effortlessly engage in buying, selling, sending, and receiving XRP, regardless of the transaction size.
You can also diversify your portfolio with a variety of cryptocurrencies and fiat currencies and even link your bank account for convenient and smooth transactions.
Conclusion On XRP Wallets
In conclusion, there is a wide range of options available for managing XRP tokens, each with its own unique strengths and considerations. When choosing an XRP wallet, it is crucial to prioritize factors such as security, user experience, and compatibility with different platforms.
However, when choosing an XRP wallet, prioritize security by downloading wallets from official sources and safeguarding private keys and recovery phrases. A user-friendly interface and intuitive features enhance the XRP management experience. Compatibility with different platforms ensures convenient access, and considering additional features like portfolio diversification and staking can be beneficial.
By carefully evaluating these factors and taking individual preferences into account, one can find the ideal XRP wallet that meets their specific needs. This enables a secure and seamless experience in storing, sending, receiving, and managing XRP tokens, ensuring confidence and peace of mind in the cryptocurrency journey.
What Are The Top 8 DeFi And Web3 Wallets To Use In Crypto?
In this article, we will explore the finest Web3 and DeFi wallets that offer substantial advantages to crypto users. While Web3 wallets and DeFi wallets share a strong connection, it’s important to understand their distinctions. By highlighting the top wallets in both categories, we aim to provide users with valuable insights into the wallets that can enhance their Web3 and DeFi experiences.
Web3 wallets are specifically crafted to engage with decentralized applications (DApps) on blockchain networks, empowering users with the essential tools to securely oversee their digital assets and participate in the realm of decentralized web.
Essential Aspects To Note Regarding Web3 Wallets
Cross-Chain Support: Most Web3 wallets support multiple blockchain networks, allowing users to access and manage various DApps and different cryptocurrencies from a single interface.
Seamless DApp Interaction: Web3 wallets allow users to seamlessly connect and interact with a wide range of DApps. They provide a convenient way to authenticate with DApps, sign transactions, and manage account balances.
Enhanced Security Features: Web3 wallets optimizes security measures, such as encrypted storage of private keys and protection against phishing attacks. They often offer features like two-factor authentication and recovery options to ensure the safety of user funds.
Essential Features Of DeFi Wallet
DeFi wallets are a specialized category of Web3 wallets designed specifically for the decentralized finance ecosystem. These wallets offer advanced functionalities and specific features essential for engaging in diverse DeFi protocols like lending, borrowing, yield farming, and staking. By catering to the unique requirements of DeFi, these wallets empower users to seamlessly participate in the decentralized financial landscape. These wallets provide supplementary features specifically designed to cater to the needs of DeFi users.
Here are some characteristics of DeFi wallets:
Token Swapping and Yield Farming: DeFi wallets often include built-in features for token swapping and yield farming. Users can swap tokens directly within the wallet interface and participate in yield farming to earn rewards.
DeFi Protocol Integration: DeFi wallets integrate with popular DeFi platforms, enabling users to easily access and interact with lending protocols, decentralized exchanges (DEXs), yield farming platforms, and more.
Gas Optimization: Gas optimization features enable users to estimate and adjust transaction fees, ensuring cost-efficient interactions with DeFi protocols.
Note: DeFi and Web3 share some common features, as they both operate within the broader context of blockchain technology and decentralized applications (DApps).
Examples Of Enhanced Web3 And DeFi Wallets
Metamask Wallet
MetaMask is a popular and user-friendly Web3 wallet that has garnered considerable recognition within the cryptocurrency community. Serving as a browser extension wallet that seamlessly integrates with the Ethereum network, users can easily manage their Ethereum-based assets, including Ether (ETH) and ERC-20 tokens.
MetaMask also features a built-in DApp browser, enabling direct access and interaction with a wide range of Ethereum-based decentralized applications (DApps). The wallet prioritizes security by implementing encrypted storage, password protection, and optional hardware wallet integration.
Additionally, MetaMask supports token swapping through decentralized exchanges (DEXs) like Uniswap and SushiSwap, along with integration with various DeFi platforms for lending, borrowing, yield farming, and other DeFi activities. It also offers compatibility with multiple Ethereum test networks for testing and development purposes.
MetaMask supports various networks in addition to the Ethereum mainnet. A few of the numerous networks supported by MetaMask are Binance Smart Chain (BSC), Arbitrum(ARB) and Polygon (MATIC), among others.
Straightforward Guide On How To Get The Metamask Wallet
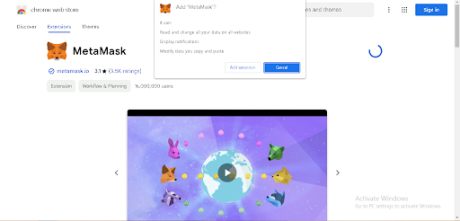
The first step is to visit the authentic Metamask website and click on the “Get Chrome Extension” or “Get Firefox Add-On” button, depending on your browser choice.
See the Chrome browser Illustration below:
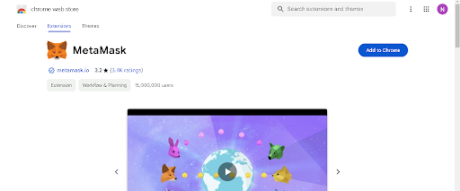
After clicking on the “Add to Chrome” button, a popup window will appear, asking for confirmation to add the extension. Click “Add Extension” to proceed.
Once the extension is installed, you will see the MetaMask icon in your browser toolbar. Click on the icon to launch MetaMask. You will be presented with the option to create a new wallet.
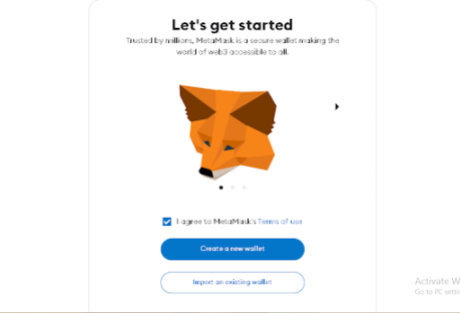
Once that is done, follow the on-screen instructions to create a new wallet.
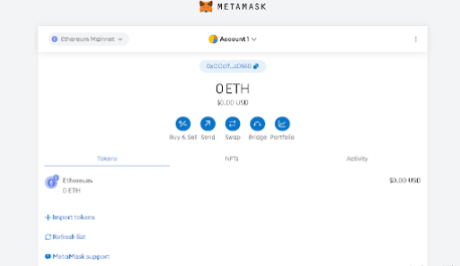
In the final step, MetaMask will provide you with a unique seed phrase consisting of 12 or 24 words. Write it down and keep it securely offline. Confirm your seed phrase as prompted by MetaMask by selecting the words in the correct order, after which you can start using MetaMask to manage your Ethereum-based assets, interact with DApps, and participate in DeFi activities.
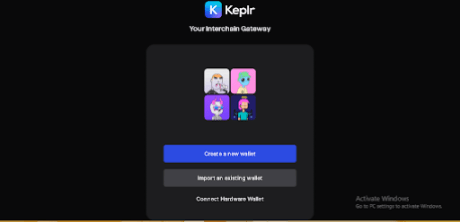
Keplr Wallet For Web3
Keplr is a web3 wallet primarily designed for interacting with decentralized applications (DApps) on the Cosmos network. However, it offers support for specific decentralized finance (DeFi) functionalities within the Cosmos ecosystem. The Keplr wallet is known to support networks like Celestia, Osmosis, Terra, and Secret Network.
How To Get And Set Up Keplr Wallet
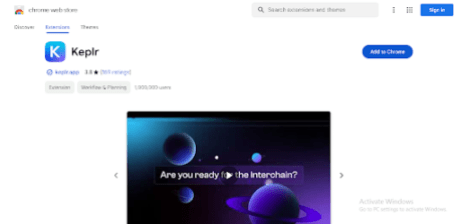
To begin, you should install the Keplr extension with the appropriate extension store for your browser, such as the Chrome Web Store. To Download, click on the “ Add to Chrome” button as illustrated below:
When creating a new wallet, carefully follow the instructions displayed on your screen to establish a robust password and consent to the terms of use. Remember to store your password securely since it is essential for accessing your wallet (If you have an existing wallet, select the “Import Existing Wallet” option and follow the instructions).
Write down your recovery or seed phrase and store it securely. Remember, it is advisable to never store your seed phrase online due to the risk of being hacked.
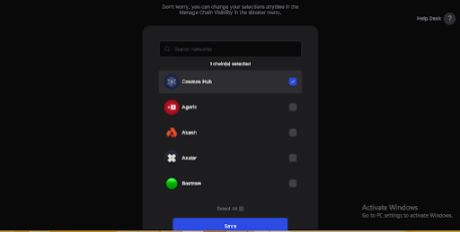
After setting up or importing your wallet, connect to the desired network or blockchain supported by Keplr. Once connected, you can start interacting with Cosmos ecosystem DApps. Explore the available DApps and features, and follow on-screen instructions to use them with your Keplr wallet.
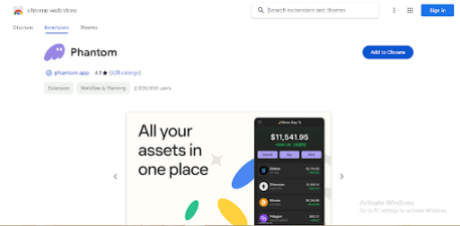
Phantom Wallets
Phantom is a widely used cryptocurrency wallet specifically created for the Solana blockchain. It provides an intuitive interface and smooth integration with Solana-based decentralized applications (DApps), enabling users to securely manage, transfer, and receive digital assets within the Solana ecosystem.
How To Get Phantom Wallet
To get started, install the Phantom extension from the relevant extension store for your browser, like the Chrome Web Store. Click on the “Add to Chrome” button, as shown in the illustration below:
To set up your Phantom wallet, simply click on the Phantom icon located in your browser’s toolbar, which will launch the wallet interface. From there, follow the on-screen instructions to either create a new wallet or import an existing one using your recovery phrase or private key.
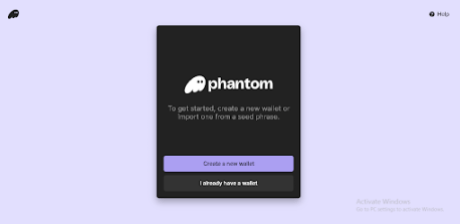
Set a strong password you can remember and save recovery phrases offline (do not store on the device).
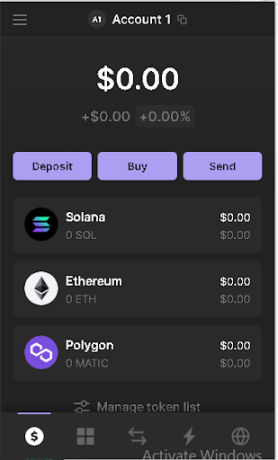
Once your wallet is set up, you can conveniently access it at any time by selecting the Phantom icon in your browser’s toolbar. This grants you the ability to manage your digital assets, engage with Solana-based DApps, and carry out various wallet-related tasks.
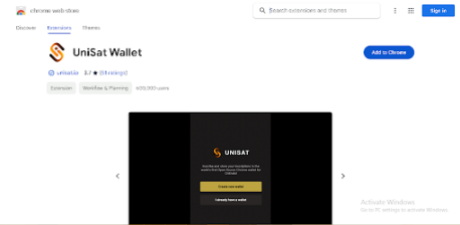
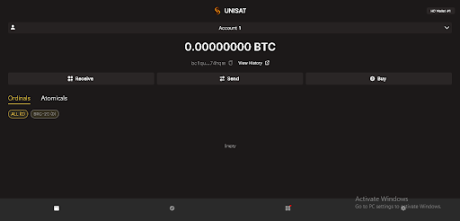
UniSat Wallet
UniSat Wallet is an open-source Chrome extension that provides a secure and user-friendly solution for storing and transferring bitcoins and Ordinals on the Bitcoin blockchain. It offers features like immediate access to unconfirmed transactions, enabling faster inscription operations without a full node. Additionally, it supports the storage and transfer of BRC-20 tokens, allowing users to manage both bitcoins and BRC-20 tokens in one wallet.
How To Get UniSat Wallet For Web3
To begin, install the UniSat extension from the relevant extension store for your browser, like the Chrome Web Store. Click on the “Add to Chrome” button, as shown in the illustration below:
For the next step, simply click on the UniSat icon located in your browser’s toolbar, which will launch the wallet interface. From there, follow the instructions to either create a new wallet or import an existing one using your recovery phrase or private key.

Once your wallet is set up, you can conveniently access it at any time by selecting the UniSat icon in your browser’s toolbar.
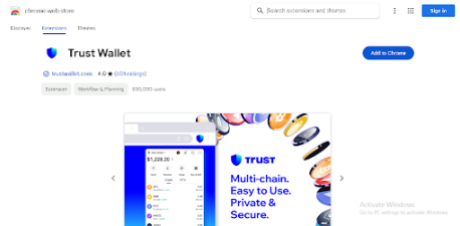
Trust Wallet
Trust Wallet is a versatile wallet that serves as both a decentralized finance (DeFi) and a Web3 wallet. It enables users to interact with decentralized applications (DApps) and protocols within the DeFi ecosystem, including decentralized exchanges, lending platforms, and yield farming protocols. Additionally, it integrates with the Web3 ecosystem, allowing users to interact directly with blockchain networks, sign transactions, and securely manage their digital assets on platforms like Ethereum and other compatible networks.
How To Get Trust Wallet For Web3
First, users can download the Trust Wallet app or install the Trust Wallet extension from the relevant extension store for their browser or mobile device, like the Chrome Web Store. Click on the “Add to Chrome” button, as shown in the illustration below:
Next, simply click on the Trust Wallet icon located in your browser’s toolbar, which will launch the wallet interface. From there, follow the instructions to either create a new wallet or import an existing one using your secret phrase as instructed in the image below:
Once you have meticulously set up your password and safely stored your secret phrase offline, you will gain access to your Trust Wallet. With these security measures in place, you can securely and confidently log into your Trust Wallet account and manage your digital assets.
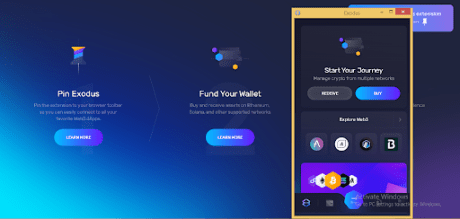
Exodus Wallet
Exodus Wallet is a widely used software wallet for cryptocurrencies, offering users a secure means to store, manage, and trade various digital assets. It is accessible as a desktop application compatible with Windows, Mac, and Linux systems, along with a mobile app for iOS and Android devices. Exodus Wallet provides support for multiple blockchain networks, enabling users to effectively handle and engage with diverse cryptocurrencies. Among the networks supported are Litecoin (LTC), Stellar (XLM), Ripple (XRP), and Bitcoin (BTC).
How To Set Up Exodus Wallet
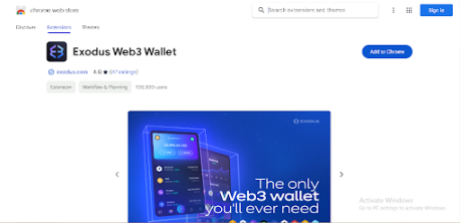
To begin, download and install the Exodus Wallet extension from the appropriate extension store based on your browser, such as the Chrome Web Store. Locate the “Add to Chrome” button, as depicted in the accompanying image, and click on it to initiate the installation process.
To proceed, just click on the Exodus icon situated in the toolbar of your browser. This action will open the wallet interface, where you can then follow the provided instructions to either generate a new wallet or import an existing one using your recovery phrase or private key.
For new wallets, do not forget to write down your recovery phrase in a safe place and do not store it online. Additionally, it is advisable to not take screenshots as well.
Next, Click on the “Create New Wallet” and carefully set up your password or “I Have A Wallet” button using your secret phrase to get started.
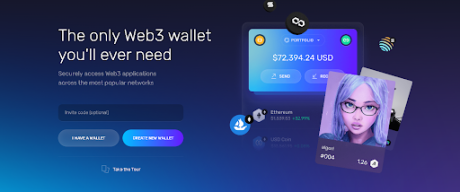
Then, you can connect Exodus wallet to a network of your choice and start your trading journey:
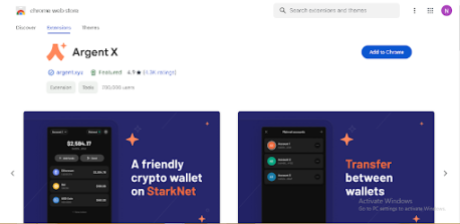
Argent Wallet For DeFi
Argent Wallet is a popular non-custodial cryptocurrency wallet that prioritizes simplicity, security, and usability. It serves as a Web3 wallet, offering users a convenient and user-friendly interface to engage with decentralized applications (DApps) and the broader Web3 ecosystem.
By integrating with Ethereum and compatible networks such as xDai, Polygon (MATIC), and Ethereum (ETH), Argent Wallet empowers users to manage their digital assets and actively participate in various Web3 activities. With its focus on user experience and compatibility with multiple networks, Argent Wallet provides a versatile solution for individuals seeking a seamless and secure Web3 wallet experience.
How To Get And Set Up Argent Web3 Wallet
To get started, you’ll need to install the Argent extension for your browser by visiting the appropriate extension store, such as the Chrome Web Store. Look for the “Add to Chrome” button, which is depicted in the accompanying illustration. Click on that button to initiate the installation process.
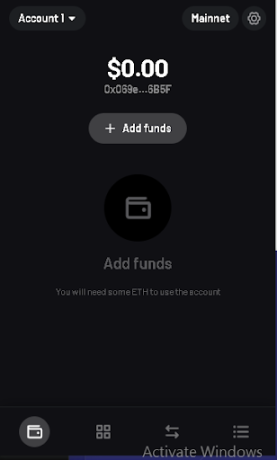
Next, if you’re a new user, click on “Create a new wallet,” and you will be prompted to create a password.
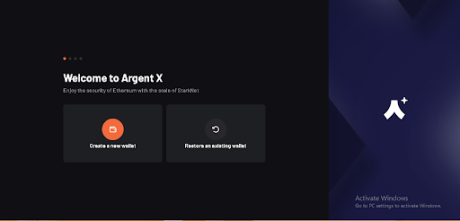
To securely manage and interact with digital assets, decentralized applications (DApps), and the Web3 ecosystem, save your recovery phrase (write it down. do not store it on your device), and your Argent wallet will be ready to use.
OKX Wallet For DeFi
OKX Wallet is a prominent non-custodial wallet that provides users with the ability to securely manage their cryptocurrencies, non-fungible tokens (NFTs), and digital assets within a unified platform.
With OKX Wallet, users have the capability to purchase, trade, earn, and oversee their digital assets across more than 50 blockchains, including Bitcoin, Ethereum, OKT Chain, Solana, BSC, and Aptos, all available in over a dozen languages.
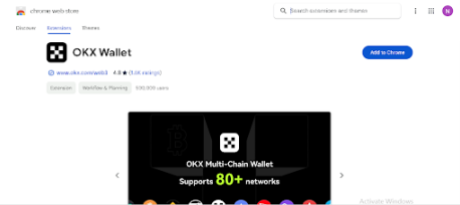
How To Set Up OKX Wallet
To set up using the Chrome browser extension, click on the ‘Add to Chrome” button in the top right corner, as shown in the image below:
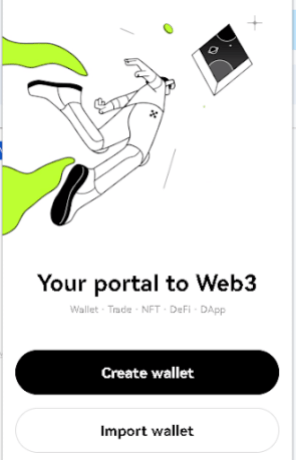
Next, select the “Create Wallet” option as shown below:
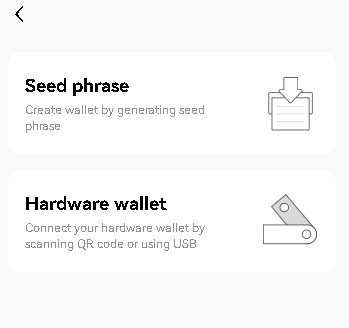
OKX will present users with the option of creating wallets with either seed phrases or hardware wallets. In the absence of hardware wallets, as in this case, select the “seed phrase” option.
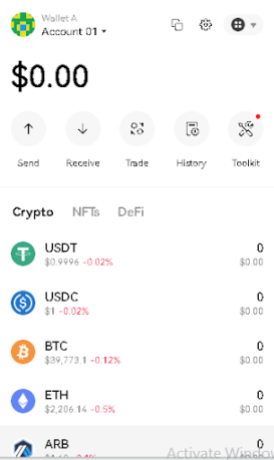
Set the password, verify the seed phrase, and your OKX wallet will be ready to use. Write down your seed phrase and store in a safe place. Do not store online.
Downloading DeFi And Web3 Wallets On Mobile Phones
The wallets listed in this guide also have mobile versions which are available on the app stores of your mobile phone. Navigate to the Apple App Store for iOS or the Google Play Store for Android, input the name of the wallet you want to download in the search bar, make sure you have the correct app and click “Download.”
To set up the wallets on mobile phones, follow the same steps outlined in this guide to get started, and your wallets will be set up.
Conclusion
In conclusion, Web3 and DeFi wallets offer users enhanced digital asset management and participation in decentralized applications. Web3 wallets provide cross-chain support, seamless DApp interaction, and enhanced security features, while DeFi wallets cater specifically to the decentralized finance ecosystem with functionalities like token swapping and yield farming. Understanding these unique characteristics helps users make informed choices.
Examples of enhanced Web3 and DeFi wallets worth exploring have been mentioned in this article. Staying informed about the latest developments in this evolving technology is crucial for unlocking the full potential of decentralized applications and ensuring asset security.
Trust the best strategy in crypto bear market — Trust Wallet CEO

Cointelegraph sat down with Trust Wallet CEO Eowyn Chen to talk about how Web3 can become a better experience for everyone.
TrustWallet’s TWT Falls as Parent Company Binance Releases Web3 Wallet
TrustWallet’s native token [TWT] has plunged over the past few hours after Binance, the exchange that acquired TrustWallet in 2018, releases its own competing web3 wallet.
Only 6 out of 45 crypto wallet brands have undergone penetration testing: Report

Cybersecurity certification platform CER said the vast majority of wallets do not hire outside experts to perform penetration tests.
Trust Wallet to reimburse users after $170,000 security incident

The vulnerability impacted wallet addresses created through the browser extension between November 14-23, resulting in nearly $170,000 in losses.
How to stake Polygon (MATIC)

Staking MATIC helps one to generate passive income. Find how to stake MATIC via MetaMask, Binance, Coinbase Wallet and Trust Wallet.
‘Haunts me to this day’ — Crypto project hacked for $4M in a hotel lobby

The co-founder of Webaverse said they somehow got their crypto hacked from their Trust Wallet during a meeting with two people claiming to be investors.
What is the Trust Wallet and how do you use it?
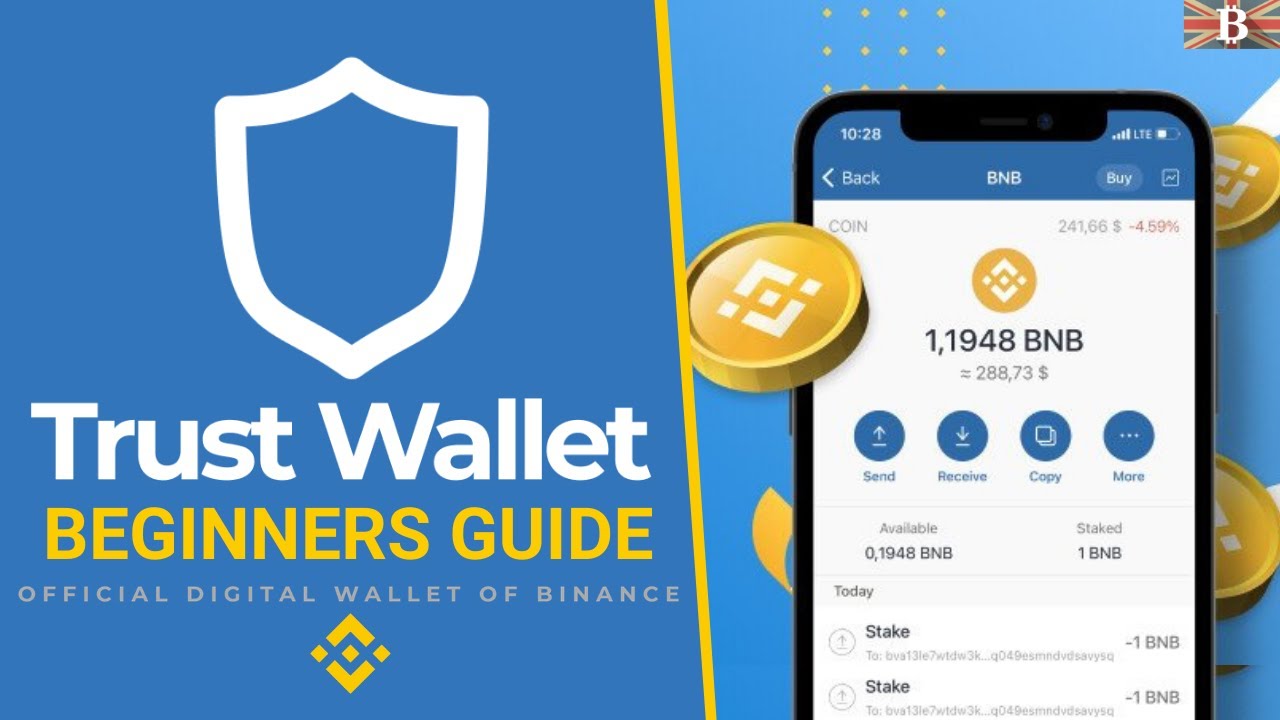

Trust Wallet is a secure noncustodial cryptocurrency wallet that supports multiple blockchains.
FTX collapse is Trust Wallet Token’s gain — Why did TWT price soar 150% in six days?
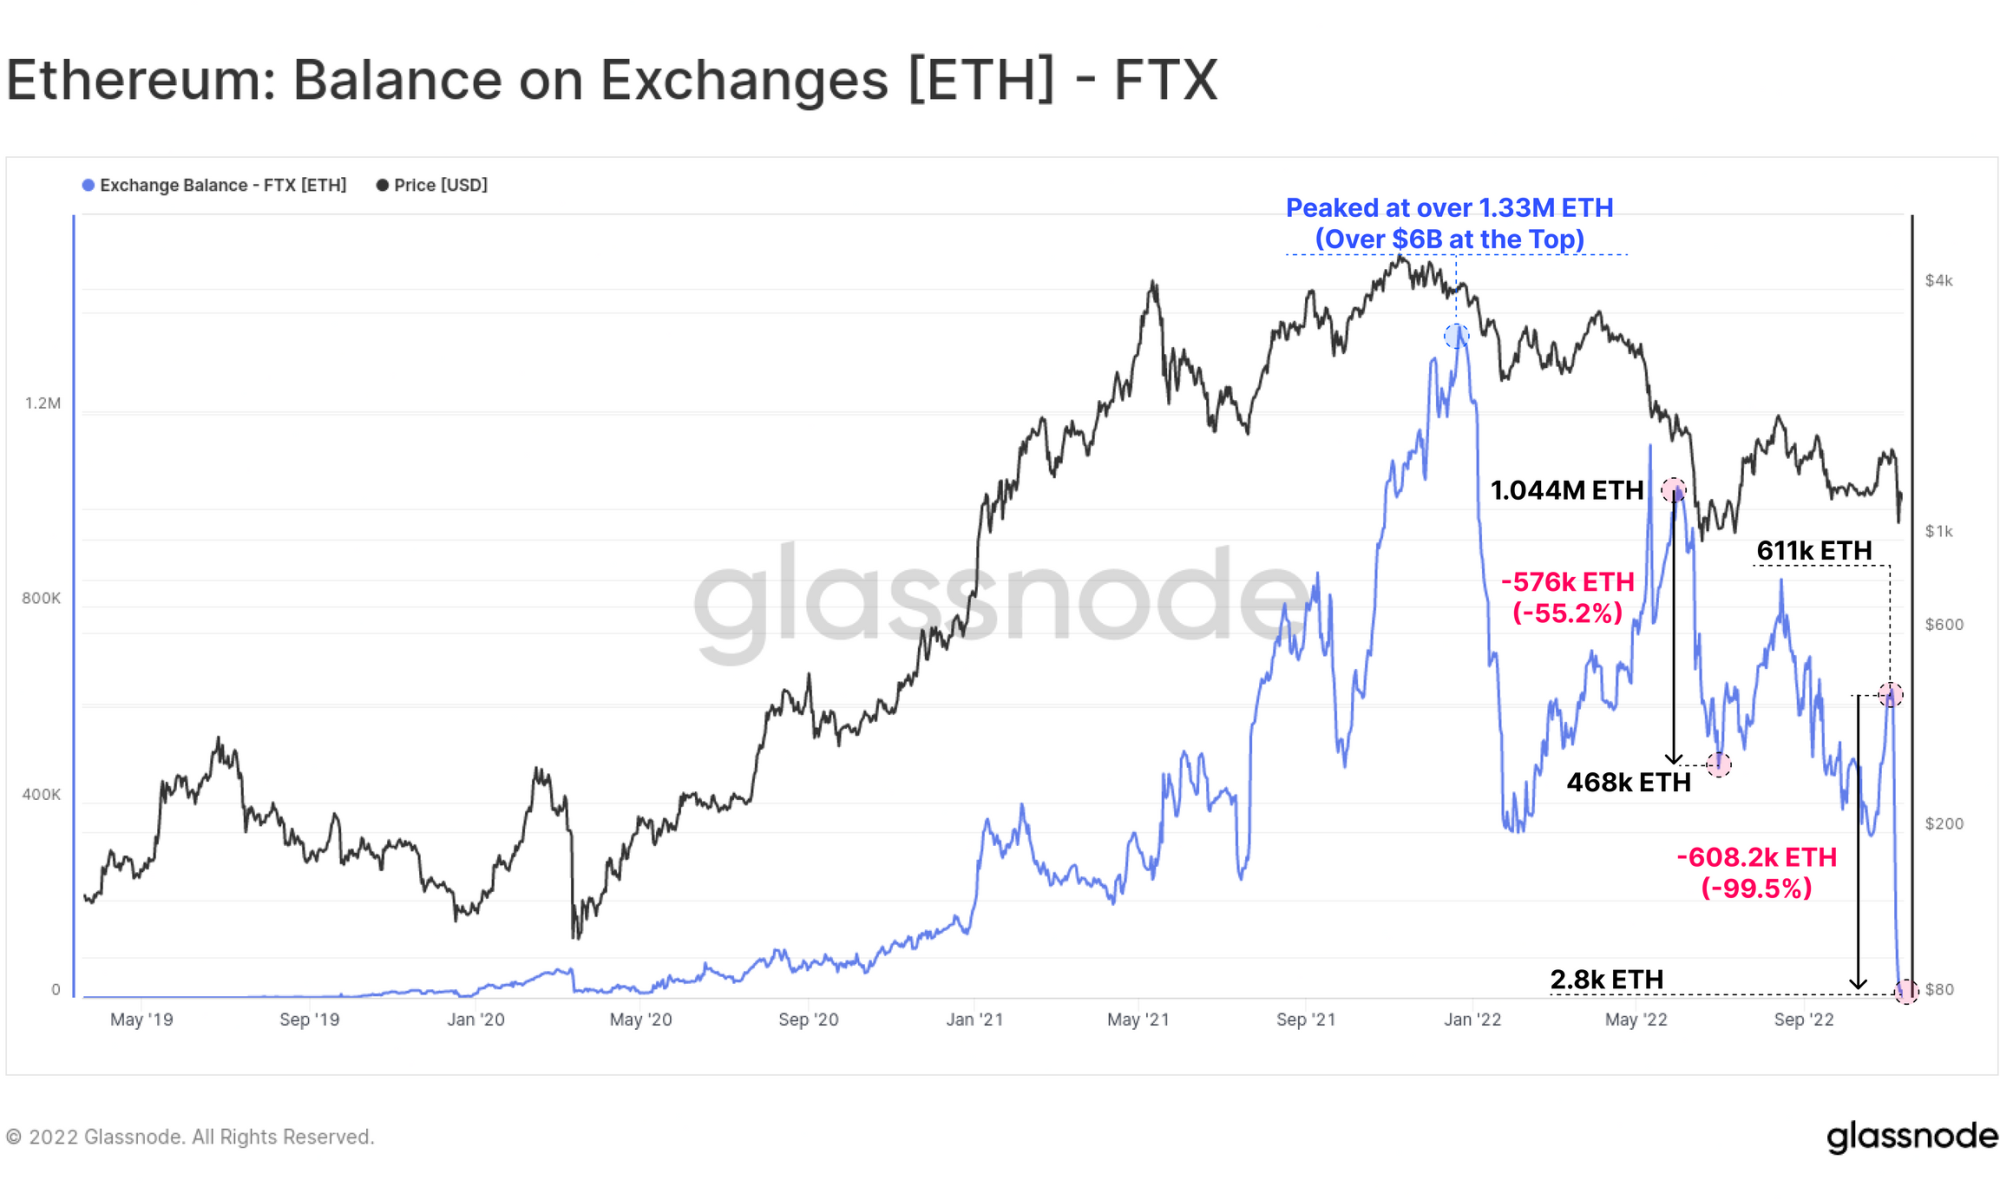

An exodus from centralized cryptocurrency exchanges after FTX’s collapse appears to be the primary reason behind Trust Wallet Token’s massive rally.
CZ and Saylor urge for crypto self-custody amid increasing uncertainty

Binance CEO Changpeng Zhao said self-custody is a “fundamental human right,” while Michael Saylor said self-custody is necessary to prevent powerful actors from accumulating and abusing power.
3 barriers preventing Web3 mass adoption — Trust Wallet CEO

Trust Wallet CEO says the current bear market could provide an opportunity for the Web3 industry to address consumer concerns before the next bull market.
How to use UniSwap: A step-by-step beginner’s guide

There are several ways in which users can get started using the Uniswap DEX such as the MetaMask wallet, the Trust Wallet, and the Coinbase wallet.
Binance’s Trust Wallet Adds Support for XRP, Credit Card Payments

Cryptocurrency exchange Binance’s official wallet, Trust Wallet, has added support for XRP and credit card payments.
Binance Acquires Anonymous Mobile Wallet for Ethereum Tokens

Cryptocurrency exchange Binance has acquired the open-source and anonymous mobile ethereum wallet Trust Wallet, it was announced Tuesday.


